Cheeseburger Sliders: Baked and Beefy
- How to Craft the Most Craveable Cheeseburger Sliders
- The Secret Technique for Ideal Slider Texture
- Detailed Analysis of Key Ingredients
- Elements Required for Assembly
- Vital Kitchen Tools
- Executing the Recipe Steps
- Improving Your Slider Results
- Adjusting the Recipe Size
- Decision Shortcuts for Your Sliders
- Correcting Common Slider Myths
- Effective Storage and Waste Reduction
- Pairing Your Sliders for a Feast
- Recipe FAQs
- 📝 Recipe Card
How to Craft the Most Craveable Cheeseburger Sliders
There is a specific sound that happens when finely diced onions hit a hot stainless steel skillet with just a touch of fat. It is a sharp, energetic sizzle that immediately fills the kitchen with that unmistakable base note of comfort.
Whenever I start browning the meat for these cheeseburger sliders, my family magically appears in the kitchen within minutes, drawn in by the aroma of rendering beef and toasted spices.
I used to just throw patties on the grill, but then I discovered the communal joy of a slider slab, and honestly, we've never looked back.
The first time I tried making cheeseburger sliders on hawaiian rolls, I made a massive rookie mistake. I piled the hot meat directly onto the soft bread and ended up with a soggy, structural disaster that required a fork to eat.
It was a mess, but it taught me the most important lesson in slider history: the moisture barrier. Now, I use a specific par baking technique that ensures the bottom bun stays sturdy enough to hold all that juicy goodness without losing its soft, pillowy soul.
It's these little shifts in technique that turn a simple snack into the kind of meal people talk about for weeks.
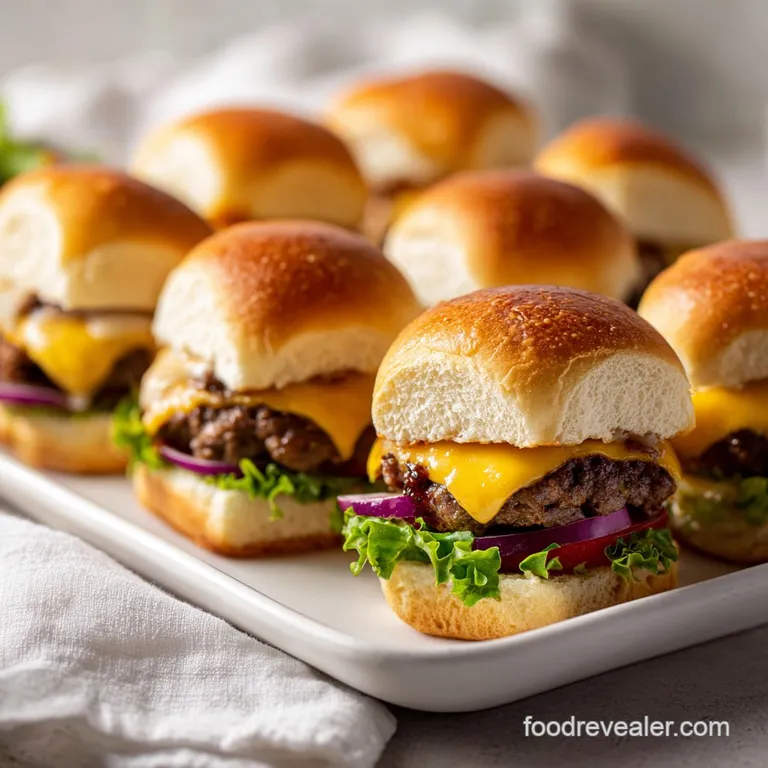
We are going for a texture that offers a slight crunch on the outside of the roll, followed by a velvety melt of sharp cheddar and the savory crumble of seasoned beef. This isn't just a mini burger, it's a carefully engineered bite of nostalgia.
We're skipping the heavy grease of fast food and leaning into a "better for-you" secret sauce that uses Greek yogurt for a tangy kick that cuts right through the richness of the cheese.
Trust me, once you smell that garlic butter glaze bubbling away in the oven, you'll know exactly why this recipe is a permanent fixture on my roster for party food ideas for adults.
The Secret Technique for Ideal Slider Texture
Creating the ultimate cheeseburger sliders requires more than just layering ingredients; it's about managing moisture and heat distribution to ensure every bite is consistent. When we bake these as a single slab, we're essentially creating a pressurized steam environment inside the foil, which helps the cheese fuse the meat to the bread, preventing the fillings from sliding out when you take a bite.
- Maillard Enhancement: Browning the beef thoroughly in the skillet creates complex flavor compounds that raw packing the meat into the rolls simply can't achieve.
- The Par Bake Barrier: Toasting the bottom half of the rolls at 180°C for 5 minutes creates a crisp "crust" that prevents the meat juices and secret sauce from soaking into the crumb and making it mushy.
- Dual Phase Melting: Placing cheese both below and above the meat acts as a culinary "glue," anchoring the beef to both the top and bottom buns for better structural integrity.
- Fat Emulsification: The inclusion of Greek yogurt and low sugar mayonnaise in the sauce creates a creamy coating that stays stable under heat rather than breaking into an oily mess.
- Aromatic Infusion: Brushing the garlic butter glaze over the rolls while they are hot allows the fat to carry the garlic flavor deep into the cracks of the bread.
| Thickness of Meat Layer | Internal Temp | Rest Time | Visual Cue |
|---|---|---|---|
| 1.5 cm | 71°C | 3 mins | Cheese is bubbling and rolls are golden |
| 2 cm | 71°C | 5 mins | Glaze has fully absorbed into the crust |
| 1 cm | 71°C | 2 mins | Edges of the cheese are slightly browned |
Choosing the right approach for your beef prep can significantly impact your afternoon. While fresh is usually king for flavor depth, there are times when the shortcut is a lifesaver for big gatherings or quick dinner ideas for family.
| Meat Choice | Preparation Time | Flavor Impact | Best For |
|---|---|---|---|
| Fresh 90% Lean Beef | 15 minutes | Deep, beefy, and customizable seasoning | The ultimate weekend family dinner |
| Pre cooked Crumbles | 2 minutes | Mild, consistent, but slightly drier | Last minute finger foods for birthday parties |
Detailed Analysis of Key Ingredients
Understanding how each component behaves under heat helps you master these baked cheeseburger sliders. We aren't just looking for flavor; we're looking for performance. The choice of 90% lean beef is deliberate because it provides enough fat for flavor without leaving a pool of grease that would compromise the Hawaiian rolls.
| Ingredient | Science Role | Pro Secret |
|---|---|---|
| Sharp Cheddar | Structural Binder | Use thick slices to create a solid "floor" for the beef mixture. |
| Worcestershire Sauce | Umami Booster | The fermented anchovies provide a deep savory note that mimics aged beef. |
| Greek Yogurt | Acid Balance | The lactic acid cuts through the heavy fats, brightening the overall flavor profile. |
| Smoked Paprika | Flavor Depth | Adds a "grilled" aroma even though the sliders are baked in an oven. |
Between the savory meat and the sweet rolls, the chemistry of these ingredients creates a balanced bite. The sugars in the Hawaiian rolls undergo caramelization at the same time the cheese reaches its perfect "stretch" point, resulting in a professional grade result every time.
Elements Required for Assembly
- 450g Lean Ground Beef (90% lean)Why this? Provides enough moisture without making the rolls greasy or soggy.
- Substitute: Ground turkey (add 1 tsp olive oil for fat content).
- 1 small Yellow Onion, finely dicedWhy this? Adds sweetness and essential moisture to the beef crumbles.
- Substitute: 1 tbsp onion powder (though you'll lose the texture).
- 2 cloves Garlic, mincedWhy this? Provides a sharp, aromatic punch that balances the sweet rolls.
- Substitute: 0.5 tsp jarred minced garlic.
- 1 tsp Worcestershire sauceWhy this? The "secret" to making lean beef taste like a gourmet burger.
- Substitute: Soy sauce for a similar salty umami hit.
- 0.5 tsp Smoked PaprikaWhy this? Mimics the flavor of a charcoal grill in a standard oven.
- Substitute: Liquid smoke (use only 1-2 drops).
- 0.25 cup Plain Greek YogurtWhy this? Adds creaminess to the sauce with less fat than heavy mayo.
- Substitute: Sour cream for a richer, more traditional flavor.
- 2 tbsp Low Sugar MayonnaiseWhy this? Acts as the emulsifier to keep the secret sauce smooth.
- Substitute: Avocado oil mayo for a dairy-free base.
- 1 pack (12 count) Sweet Hawaiian RollsWhy this? The sweetness perfectly offsets the salty bacon cheeseburger sliders vibe.
- Substitute: Brioche slider buns for a less sweet, richer crumb.
- 8 slices Sharp Cheddar CheeseWhy this? Has a lower oil to protein ratio, so it melts without separating.
- Substitute: Pepper jack for a spicy kick.
- 60ml Unsalted Butter, meltedWhy this? Carries the garlic and sesame flavors across the top crust.
- Substitute: Olive oil (though it lacks the classic buttery aroma).
Vital Kitchen Tools
To get the best results, you'll want a heavy bottomed skillet. I prefer a cast iron skillet such as a Lodge, as it holds heat beautifully and gives the beef a better sear. You'll also need a 23x33 cm (9x13 inch) baking sheet.
If you use a glass baking dish, just keep an eye on the bottom of the rolls, as glass can sometimes brown the bread faster than metal.
A sharp serrated knife is also non negotiable. You want to slice through the entire slab of rolls in one clean motion. If you use a straight edge knife, you'll likely squish the airy rolls, ruining that fluffy texture we love.
Finally, grab some aluminum foil to cover the pan during the first half of the bake; this keeps the moisture in so the cheese melts before the bread burns.
Executing the Recipe Steps
1. Sauté the Savory Base
In a large skillet over medium high heat, brown the 450g lean ground beef with the diced onions. Use a wooden spoon to break the meat into very small crumbles. Cook for about 8 minutes until no longer pink and onions are translucent.
Note: Small crumbles ensure every slider gets an equal amount of meat.
2. Infuse with Aromatics
Drain any excess liquid from the skillet to keep the sliders crisp. Stir in the minced garlic, Worcestershire sauce, smoked paprika, salt, and pepper. Cook for 1 more minute until you smell the garlic and smoke.Note: Adding garlic at the end prevents it from burning and becoming bitter.
3. Prepare the Bread Vessel
Preheat your oven to 180°C. Slice the entire slab of rolls in half horizontally using a serrated knife. Place the bottom half on a 23x33 cm baking sheet. Bake the bottom rolls for 5 minutes until the surface feels slightly firm.
Note: This is the critical moisture barrier step!
4. Create the Secret Sauce
In a small bowl, whisk together the Greek yogurt, low sugar mayonnaise, yellow mustard, sugar-free ketchup, and chopped pickles. Whisk until the sauce is a uniform pale orange color.Note: The pickles add a necessary crunch and vinegary snap.
5. Layer the Base Cheese
Layer 4 slices of the sharp cheddar cheese directly onto the par baked bottom rolls. Overlap them slightly to ensure full coverage.Note: This first layer of cheese acts as a waterproof seal for the bread.
6. Add the Beef Filling
Spread the warm beef mixture evenly over the cheese layer. Use the back of your spoon to press the meat down gently so it stays in place. Ensure the meat reaches all the way to the edges.Note: This prevents "empty corners" in the outer sliders.
7. The Final Cheese Layer
Place the remaining 4 slices of cheddar cheese over the beef. This second layer will melt into the top bun, locking the whole slider together.
8. Apply the Mahogany Glaze
Place the top half of the rolls over the cheese. In a small bowl, combine the melted butter, garlic powder, and sesame seeds. Brush the glaze generously over the tops and sides of the rolls.Note: The sesame seeds provide a "shatter" texture to the soft bun.
9. The Covered Bake
Cover the pan tightly with aluminum foil. Bake for 10 minutes at 180°C. Note: The foil traps steam, which softens the bread while the cheese melts into the beef.
10. The Final Crisp
Remove the foil and continue to bake for an additional 5-10 minutes. Wait until the tops are golden brown and you hear the butter sizzling slightly.Note: This step gives you that addictive crusty top.
Improving Your Slider Results
If your sliders feel a bit unstable, it's usually a temperature issue. If the meat is cold when you assemble, the cheese won't melt fast enough to "grab" the beef before the bread gets too dark. Always make sure your beef mixture is still warm when it hits the rolls.
Fixing Bun Soggy Bottoms
The most common complaint with baked cheeseburger sliders is a wet bottom bun. This usually happens if the meat wasn't drained well enough or if you skipped the par baking step. The steam from the meat gets trapped against the bread, and without that toasted "crust" we created in step 3, the bread acts like a sponge.
| Problem | Root Cause | Solution |
|---|---|---|
| Rolls are too soft | Excess steam trapped under foil | Uncover for the last 10 mins of baking. |
| Meat falls out | Beef crumbles are too large | Chop meat finer during the browning stage. |
| Bottom is wet | Meat wasn't drained properly | Use a colander to remove all fat after browning. |
Common Mistakes Checklist
- ✓ Pat the pickles dry before chopping to prevent the secret sauce from becoming watery.
- ✓ Don't skip the foil during the first 10 minutes or the bread will dry out before the cheese melts.
- ✓ Use a serrated knife (bread knife) to avoid crushing the rolls while slicing.
- ✓ Let the sliders rest for 3 minutes after baking so the cheese can set slightly before you cut them.
Adjusting the Recipe Size
When you're making these for a smaller crowd, you can easily cut the recipe in half. Just use a 6 pack of rolls and a smaller square baking pan. Reduce the oven time by about 5 minutes, but keep the temperature at 180°C.
For the egg based glazes (if you ever swap butter for egg wash), beat one egg and just use half to avoid a soggy top.
If you are scaling up for a big party, you can do two or three slabs at once. When doubling the spices, I recommend only using 1.5x the salt and paprika initially, as these flavors can become overwhelming when multiplied.
You’ll want to rotate your baking sheets halfway through the cook time to ensure the slab on the bottom rack gets the same golden brown finish as the one on top.
Decision Shortcuts for Your Sliders
- If you want a Crispier Top, brush with a bit of egg white mixed into the butter.
- If you want a Spicier Kick, add chopped jalapeños directly into the beef mixture.
- If you want a Healthier Option, swap the beef for lean ground chicken and use extra Greek yogurt.
Correcting Common Slider Myths
Many people think you need to use high fat beef (like 80/20) for the "best" flavor. In reality, with cheeseburger sliders, high fat beef just leads to greasy rolls and a messy eating experience.
The 90% lean beef, when seasoned with Worcestershire and paprika, provides plenty of flavor without the structural hazards of excess grease.
Another myth is that you must use expensive "slider buns." While those are fine, the Sweet Hawaiian rolls are actually superior for this specific method. Their high sugar content allows them to caramelize beautifully, and their unique pull apart structure makes them much easier to assemble as a single slab rather than fiddling with twelve individual tiny buns.
Effective Storage and Waste Reduction
Fridge Life: You can keep leftover sliders in an airtight container in the fridge for up to 3 days. To reheat, I highly recommend using an air fryer at 160°C for 3-5 minutes.
This brings back the "shatter" crunch of the top bun that a microwave would turn into rubber.
Freezing: These sliders freeze surprisingly well! Wrap the cooled slab (or individual squares) in plastic wrap, then a layer of foil. They will stay fresh for up to 2 months. To eat, thaw them in the fridge overnight and bake at 175°C until the cheese is gooey again.
Zero Waste Tip: If you have leftover beef mixture that didn't fit on the rolls, don't toss it! It makes an incredible topping for a "burger salad" the next day, or you can stir it into some macaroni and cheese for a quick cheeseburger pasta.
If you have extra buns, toast them with a little cinnamon sugar for a sweet breakfast treat.
Pairing Your Sliders for a Feast
When I think about what to serve these with, I like to balance the richness of the cheeseburger sliders recipe with something bright and crunchy. A simple vinegar based coleslaw or some air-fried sweet potato fries works beautifully.
If you're looking for more party food ideas for adults, consider a big platter of crudités with a spicy ranch dip.
For a true "adult" birthday spread, I love pairing these with a crisp lager or a zesty ginger beer. The bubbles help cleanse the palate between those rich, cheesy bites. No matter how you serve them, the aroma of these baked cheeseburger sliders is usually enough to get everyone to the table before you even have a chance to call them.
It's a reliable, comforting classic that satisfies the soul every single time.

Recipe FAQs
Is it necessary to use a double layer of cheese in these sliders?
Yes, it is essential for structure and flavor. Placing cheddar cheese on both the bottom and top of the beef mixture acts like glue, keeping the meat contained and ensuring every bite is cheesy.
Is it true that I can skip the initial 5-minute par-bake for the rolls?
No, this is a common misconception. Par-baking the bottom half of the rolls creates a moisture barrier that prevents the beef and sauce from making the bread soggy.
How to keep the sliders from drying out in the oven?
Cover the pan with aluminum foil for the first 10 minutes of baking. This traps steam inside, ensuring the rolls stay soft while the cheese melts thoroughly before the final browning stage.
How to avoid watery secret sauce when using chopped pickles?
Pat the chopped pickles dry with a paper towel before mixing. Removing the excess brine ensures your sauce maintains a thick, creamy consistency rather than becoming thin and runny.
Is it required to let the sliders rest after pulling them from the oven?
Yes, wait 3 minutes before slicing. This short rest period allows the melted cheese to set slightly, which makes it much easier to cut through the sliders without the ingredients sliding out of the rolls.
How to ensure the rolls are sliced evenly without crushing them?
Use a serrated bread knife to saw gently through the rolls. A sawing motion prevents you from compressing the soft Hawaiian rolls, keeping the entire slab intact for easy layering.
How to achieve the perfect golden brown finish on the tops?
Remove the aluminum foil for the final 5-10 minutes of the total 15-20 minute bake time. This allows the butter, garlic powder, and sesame seed glaze to toast and turn golden while the cheese finishes melting.
Baked Cheeseburger Sliders
Ingredients:
Instructions:
Nutrition Facts:
| Calories | 285 calories |
|---|---|
| Protein | 16 g |
| Fat | 16 g |
| Carbs | 18 g |
| Fiber | 1 g |
| Sugar | 4 g |
| Sodium | 475 mg |
