Chicken Parmesan: Crispy and Classic
- Time: Active 20 minutes, Passive 25 minutes, Total 45 minutes
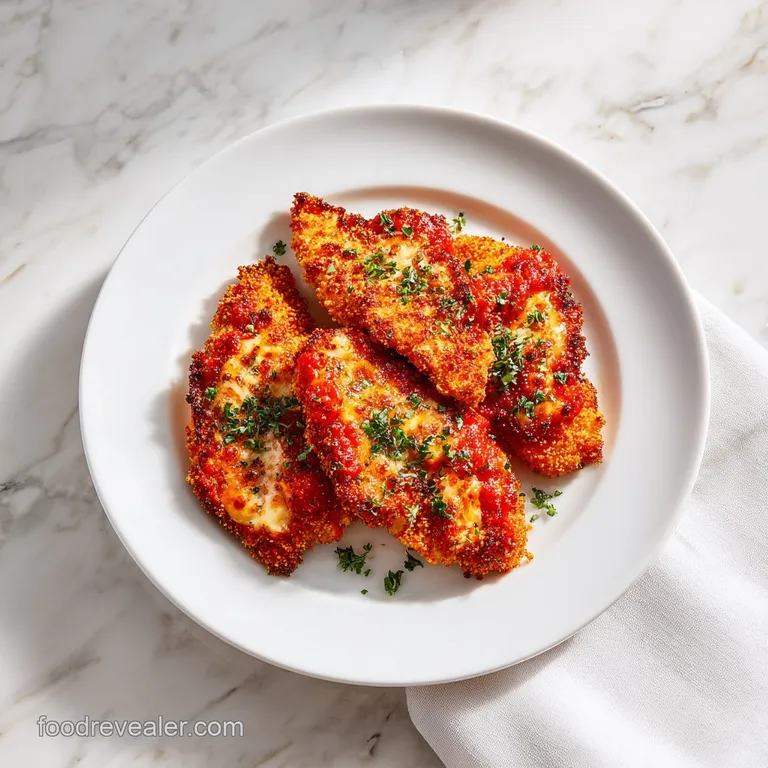
- Flavor/Texture Hook: Shatter crisp Panko crust meets velvety melted mozzarella and tangy, aromatic marinara.
- Perfect for: Stress free family dinners, Sunday comfort cooking, or impressing guests with a classic favorite.
- Master This Classic Chicken Parmesan Recipe Now
- The Secret To Flavor Success
- Key Recipe Specification Details
- The Essential Building Blocks
- Essential Kitchen Tools Needed
- Step By Step Process
- Comprehensive Troubleshooting Guide
- Clever Variations and Substitutions
- Common Kitchen Myths Debunked
- Storage and Waste Solutions
- Perfect Side Dish Pairings
- Very High in Sodium
- Recipe FAQs
- 📝 Recipe Card
Master This Classic Chicken Parmesan Recipe Now
The air in my kitchen right now is thick with the scent of toasted Parmesan and dried oregano, and honestly, it is the best kind of perfume. There is something about the way the sweet, acidic aroma of bubbling marinara sauce mingles with the nutty, savory smell of golden brown breadcrumbs that just feels like a warm hug.
It is the ultimate comfort classic, the kind of meal that makes everyone at the table go quiet because they are too busy enjoying that first, perfect crunch.
I remember the first time I tried to make this dish years ago, I made the mistake of not pounding the meat thin enough. I ended up with a crust that was nearly burnt while the center was still dangerously pink. It was a mess, but it taught me that the secret is all in the preparation and the balance of heat.
Now, when I hear that gentle sizzle as the olive oil mists over the breaded cutlets, I know we are in for something special. It is about creating layers of flavor that satisfy the soul without keeping you stuck at the stove all night.
We are going to walk through this together, from getting that chicken to the perfect uniform thickness to achieving a cheese pull that looks like something out of a magazine. This recipe is designed to be reliable and comforting, focusing on simple techniques that deliver high end results.
You won't find any experimental fusion here, just the hearty, reliable flavors of a homemade chicken parmesan recipe that works every single time.
The Secret To Flavor Success
Building a dish like this requires understanding how the different textures interact under heat. If you've ever had a soggy bottom on your breaded chicken, you know how disappointing that can be. We want to ensure that every bite has that characteristic "shatter" when you bit into it.
- Mechanical Tenderization: Pounding the chicken to a uniform 1/4 inch thickness breaks down tough muscle fibers and ensures every part cooks at the exact same rate.
- Triple Dredge Barrier: The flour, egg, and breadcrumb sequence creates a multi layered shield that locks moisture inside the meat while providing a massive surface area for browning.
- Panko Air Pockets: Unlike traditional breadcrumbs, Panko is flaky and jagged, which traps air and creates a light, airy crunch that doesn't feel heavy or greasy.
- over High heat Crisp: Starting at 425°F causes the moisture in the breading to evaporate rapidly, setting the crust before the chicken can dry out.
If you are looking for a way to satisfy those comfort cravings on a busier night, my creamy chicken casserole bake is a great option that follows some of these same flavor principles. But for today, we are focusing on the art of the perfect crust and the way the mozzarella bubbles under the broiler.
| Method | Time | Texture | Best For |
|---|---|---|---|
| Traditional Oven | 25 minutes | Uniformly crisp, less oil | Healthy everyday dinner |
| Stovetop Fry | 12 minutes | Richer, deeper golden brown | Maximum crunch factor |
| Air Fryer | 18 minutes | Shatter crisp, very low oil | Quick weeknight prep |
Using the oven method described here gives you the most reliable results for a family sized batch because it allows the chicken to cook through gently without the risk of the breading burning in a hot pan. It also keeps the kitchen a bit cleaner, which is always a win in my book.
| Ingredient | Science Role | Pro Secret |
|---|---|---|
| Panko Breadcrumbs | Texture architecture | Press them firmly into the meat to ensure they don't flake off during baking. |
| Parmesan Cheese | Flavor and Fat | Use freshly grated; the natural oils help the breading brown and add a sharp umami kick. |
| Egg Wash | Protein Glue | Whisk the eggs until no streaks remain to ensure a smooth, even coating for the Panko. |
| Marinara Sauce | Acidic Balance | A low sugar sauce prevents the dish from becoming cloying and lets the tomato brightness shine. |
The science here is simple: we are managing moisture. By creating a dry exterior and a sealed interior, we are using the chicken's own juices to steam the meat while the oven air toasts the outside.
Key Recipe Specification Details
When you are following this chicken parmesan recipe, having the right numbers in mind makes the whole process feel much more controlled. I always keep a meat thermometer handy because it takes all the guesswork out of the equation.
- Prep Time: 20 minutes (includes pounding and dredging)
- Cook Time: 25 minutes (includes the final broiler melt)
- Total Time: 45 minutes
- Yield: 4 hearty servings
- Oven Temp: 425°F (218°C)
- Internal Temp Goal: 165°F (74°C)
The 20 minutes of prep might feel like a lot if you are in a rush, but trust me, setting up your station correctly saves you 10 minutes of cleaning up later.
If the chicken is all the same thickness, you won't be hovering over the oven wondering if the thickest piece is done while the thin one turns into leather.
The Essential Building Blocks
Everything in this recipe serves a purpose. We aren't just adding breadcrumbs for the sake of it; we are building a structural masterpiece of flavor.
- 1.5 lbs chicken breasts: Boneless and skinless is best here. Why this? They provide a clean canvas for the bold flavors of the sauce and cheese.
- Substitute: Chicken thighs (boneless) for a juicier, though slightly more oily, result.
- 0.5 cup all purpose flour: This is your primer. Why this? It dries the surface of the meat so the egg wash has something to grip.
- Substitute: Cornstarch for an even crispier, gluten-free friendly base.
- 2 large eggs: The "glue" of our operation. Why this? The proteins in the egg set firmly when heated, holding the crust in place.
- Substitute: 1/4 cup heavy cream or whole milk if you are out of eggs.
- 1.5 cups Panko breadcrumbs: For that signature crunch. Why this? Their large surface area creates more "crunch points" than fine crumbs.
- Substitute: Crushed crackers or pork rinds for a different texture profile.
- 0.5 cup Parmesan cheese: Freshly grated is the only way to go. Why this? It melts into the breading, adding salt and savory depth.
- Substitute: Pecorino Romano for a saltier, tangier bite.
- 1.5 cups marinara sauce: Look for a low sugar version. Why this? Too much sugar can caramelize too quickly and mask the savory chicken flavor.
- Substitute: Crushed tomatoes seasoned with garlic and basil for a fresher taste.
- 8 oz fresh mozzarella cheese: Sliced or shredded works perfectly. Why this? It has the best meltability and a mild, creamy finish.
- Substitute: Provolone for a bit more stretch and a sharper flavor.
- Fresh basil and spices: Oregano, garlic powder, salt, pepper, and fresh basil leaves. Why this? These aromatic layers bring the traditional Italian American spirit to the dish.
Essential Kitchen Tools Needed
You don't need a professional kitchen to make a great chicken parmesan recipe, but a few specific tools will make your life much easier. I've learned the hard way that trying to pound chicken with the bottom of a heavy glass is a recipe for broken glass and ruined dinner.
- Meat Mallet: Essential for getting that 1/4 inch thickness.
- Baking Sheet with Wire Rack: This is a secret trick. Lifting the chicken off the pan allows hot air to circulate underneath, preventing the dreaded "soggy bottom."
- Three Shallow Bowls: For your dredging station. Wide, low sided bowls make the process much less messy.
- Internal Meat Thermometer: The only way to truly know when your chicken is juicy and safe to eat.
- Plastic Wrap: To cover the chicken while pounding, which prevents any splashing and keeps things sanitary.
step-by-step Process

- Prepare the chicken. Place your 1.5 lbs of chicken breasts between two sheets of plastic wrap. Using the flat side of a meat mallet, gently pound them until they are a uniform 1/4 inch thickness. Note: This ensures even cooking and tenderizes the meat fibers.
- Season the meat. Sprinkle both sides of the flattened cutlets with the 1 tsp of sea salt and 0.5 tsp of cracked black pepper. Until the seasoning is evenly distributed across every inch of the chicken.
- Set the station. Organize three shallow bowls. In the first, put 0.5 cup flour. In the second, beat the 2 large eggs. In the third, mix 1.5 cups Panko, 0.5 cup Parmesan, 1 tsp oregano, and 0.5 tsp garlic powder.
- Dredge the chicken. Dip a cutlet into the flour, shaking off the excess. Submerge it in the egg wash, then press it firmly into the Panko mixture. Until the chicken is completely cloaked in breadcrumbs with no bald spots.
- Heat the oven. Preheat your oven to 425°F (218°C). While it heats, place a wire rack over a large baking sheet. This setup is crucial for the air circulation we talked about.
- Bake the crust. Mist the breaded chicken with the 2 tbsp of olive oil (or use an oil spray). Bake for about 15-20 minutes. Until the crust is golden and crackling and the internal temperature hits 165°F.
- Sauce and cheese. Take the chicken out. Spread a thin layer of the 1.5 cups marinara in a baking dish. Place the chicken on top. Spoon a little extra sauce just over the center of each piece and top with the 8 oz of mozzarella.
- The final melt. Switch your oven to broil. Slide the dish back in for 2-3 minutes. Until the mozzarella is bubbly and bronzed in spots. Watch it like a hawk; broilers are fast!
- Garnish and rest. Remove from the oven and let it sit for 2 minutes. Garnish with the 0.25 cup fresh basil chiffonade and a final sprinkle of Parmesan.
- Serve immediately. The aroma of the fresh basil hitting the hot cheese is your signal that dinner is served.
Comprehensive Troubleshooting Guide
Even with the best instructions, things can go a little sideways in the kitchen. I've had my share of breading disasters, so don't worry if it doesn't look like a painting the first time. The taste is what matters!
Breading Falling Off Fix
If your breading is sliding off the chicken like an oversized coat, it usually means the chicken was too wet before you started. The flour needs a dry surface to grab onto. Always pat your chicken dry with paper towels before you even touch the flour bowl.
Also, make sure you aren't turning the chicken too many times; let it sit and develop that crust.
Pale Crust Solution
If your chicken is cooked to 165°F but the breading still looks like white bread, you might have been too light on the oil. The oil is what conducts the heat to brown the Panko. A good misting of olive oil is essential.
You can also toast your Panko in a dry pan for 2 minutes before breading if your oven tends to run a bit cool.
| Problem | Root Cause | Solution |
|---|---|---|
| Soggy Bottom | Trapped steam under the meat | Use a wire rack over your baking sheet to allow air circulation. |
| Dry Chicken | Overcooking beyond 165°F | Use a thermometer and pull the chicken as soon as it hits the target temp. |
| Burnt Cheese | Broiler was too close or on too long | Move the oven rack to the middle position and check every 30 seconds. |
Common Mistakes Checklist
- ✓ Pat the chicken completely dry before dredging (this is the #1 secret to breading that stays put).
- ✓ Don't skip the pounding step; uneven chicken leads to uneven textures.
- ✓ Use a wire rack for baking to ensure the bottom gets as crispy as the top.
- ✓ Let the chicken rest for 2-3 minutes before serving so the juices redistribute.
- ✓ Use fresh basil at the very end; its volatile oils disappear if cooked too long.
For those days when you're looking for a simpler version of these flavors, these Air Fryer Parmesan Tenders are a fantastic shortcut that uses a similar breading technique but takes half the time.
Clever Variations and Substitutions
This recipe is a classic, but that doesn't mean you can't have a little fun with it. Sometimes I like to add a pinch of red pepper flakes to the marinara for a "Fra Diavolo" style kick, or I'll swap the mozzarella for some smoked provolone if I'm feeling fancy.
| Original Ingredient | Substitute | Why It Works |
|---|---|---|
| Panko crumbs | Crushed Pork Rinds | Provides a high fat, zero carb crunch. Note: Changes flavor profile significantly. |
| Marinara Sauce | Pesto Sauce | Adds a bright, nutty, and herbal twist. Note: Much oilier than traditional sauce. |
| Mozzarella | Sharp White Cheddar | Adds a much stronger, tangier punch. Note: Doesn't stretch as well as mozzarella. |
If you need to scale this recipe down for two people, it is quite simple. Use half the chicken and half the dredging ingredients. For the egg, beat one large egg and just use what you need.
When scaling up for a big dinner party (8-12 people), I recommend browning the chicken in batches in a pan first, then finishing them all together in the oven on large sheet pans to save time.
Air Fryer Adaptation
If you want to use an air fryer, set it to 375°F. Cook the breaded chicken for 8 minutes, flip it, and cook for another 5-8 minutes until it hits 165°F. Add the sauce and cheese for the last 2 minutes of cook time.
It gets incredibly crispy this way!
Low Carb Swap
For a low carb version, swap the flour for almond flour and the Panko for a mix of crushed pork rinds and extra Parmesan. It won't have the exact same "shatter," but the flavor is surprisingly close and very satisfying.
Common Kitchen Myths Debunked
One big myth is that you need to deep fry the chicken to get it crispy. That is just not true! With the wire rack method and a good misting of oil, the oven does a fantastic job of creating a crunch without the mess of a gallon of hot oil on your stove.
Another myth is that "fresh" mozzarella (the kind in water) is always better. For Chicken Parm, I actually prefer the low moisture "brick" mozzarella. The fresh stuff has too much water and can make your sauce watery and your crust soggy as it melts. Save the fancy buffalo mozzarella for your Caprese salads.
Storage and Waste Solutions
If you have leftovers (which is rare in my house!), store them in an airtight container in the fridge for up to 3 days. To reheat, avoid the microwave! It will turn that beautiful crust into a soggy sponge.
Instead, put the chicken in a 350°F oven or an air fryer for 5-7 minutes until the cheese is melted again and the crust crisps back up.
You can also freeze the breaded (but uncooked) chicken cutlets for up to 2 months. Just freeze them flat on a baking sheet first, then transfer them to a freezer bag. When you're ready for dinner, you can bake them straight from frozen; just add about 10 minutes to the cooking time.
For zero waste, don't throw away the leftover dredging flour or crumbs. While you can't keep them once they've touched raw chicken, you can plan to bread some zucchini slices or onion rings at the same time to use up every bit of that flavorful Parmesan mixture!
Perfect Side Dish Pairings
While this dish is a star on its own, it loves a good supporting cast. The classic choice is a bed of al dente spaghetti tossed in the remaining marinara sauce. It is simple, filling, and lets the chicken be the hero.
If you want something a bit lighter, a crisp Caesar salad with plenty of lemon juice or some roasted garlicky broccoli works beautifully. The acidity of a lemon dressed salad cuts through the richness of the cheese and breading perfectly.
I also love serving this with a piece of crusty garlic bread to mop up every last drop of that sauce.
No matter how you serve it, the goal is the same: a hearty, soul satisfying meal that brings a little bit of comfort to your kitchen. I hope this chicken parmesan recipe becomes as much of a staple in your home as it is in mine. Happy cooking, my friend!

Very High in Sodium
1080 mg of sodium per serving (47% of daily value)
The American Heart Association recommends limiting sodium intake to no more than 2,300mg per day, with an ideal limit of under 1,500mg for most adults.
Tips to Reduce Sodium
-
Choose Low-Sodium Marinara-20%
Swap the standard marinara sauce for a 'no salt added' or 'low sodium' version. This single change can significantly cut down on hidden sodium.
-
Reduce Parmesan Cheese-15%
Parmesan cheese is a major source of sodium. Try using half the amount or opt for a reduced sodium Parmesan alternative. You can boost flavor with other seasonings.
-
Omit Added Salt-10%
The recipe calls for 1 tsp of sea salt. Eliminate this entirely. You can achieve plenty of flavor with herbs and spices.
-
Amplify with Herbs and Spices
Instead of relying on salt, generously use fresh basil, dried oregano, garlic powder, and black pepper. Consider adding other no-sodium herbs like thyme or rosemary for extra flavor.
-
Use Fresh Garlic-5%
While garlic powder is used, incorporating fresh minced garlic can add a more robust flavor without adding sodium, potentially reducing reliance on other salty components.
Recipe FAQs
What's the secret to a great chicken Parmesan?
Pounding the meat to a uniform 1/4 inch thickness is essential. This ensures every piece cooks at the same rate, preventing some areas from drying out while others remain undercooked.
What ingredients do you need for chicken Parmesan?
You need chicken breasts, flour, eggs, and a breading mix of Panko, Parmesan, oregano, and garlic powder. You will also require olive oil, marinara sauce, mozzarella cheese, salt, pepper, and fresh basil for the finish.
What are common mistakes when making Parmesan chicken?
Failing to pat the chicken dry before dredging is the biggest error. Moisture on the surface prevents the flour and egg from adhering, which causes the breading to slide off during baking.
What is the best breading for chicken parm?
Panko breadcrumbs mixed with freshly grated Parmesan provide the crunchiest results. If you enjoy mastering this type of crisp, texture focused crust, you can apply the same coating principles to our Garlic Parmesan Roasted Broccoli.
How to ensure the breading stays crispy?
Place the breaded chicken on a wire rack set over your baking sheet. This allows air to circulate underneath the meat, preventing the bottom crust from turning soggy during the bake.
How to reheat leftovers without ruining the crust?
Reheat in a 350°F oven or air fryer for 5-7 minutes. Avoid the microwave entirely, as it creates excess steam that destroys the texture of the breading.
Is it necessary to use a meat mallet for this recipe?
Yes, it is vital for achieving the correct texture. Pounding the meat not only creates the required 1/4 inch thickness but also tenderizes the muscle fibers for a better final result.
Classic Crispy Chicken Parmesan

Ingredients:
Instructions:
Nutrition Facts:
| Calories | 776 kcal |
|---|---|
| Protein | 78.3 g |
| Fat | 33.9 g |
| Carbs | 35.9 g |
| Fiber | 2.8 g |
| Sugar | 4.1 g |
| Sodium | 1080 mg |
