Classic Homemade Cheese Ball
- Time: Active 15 minutes, Passive 120 minutes, Total 135 minutes
- Flavor/Texture Hook: Smoky, velvety core with a shattering pecan and bacon crust
- Perfect for: Festive weekend brunches and effortless holiday hosting
- Create the Ultimate Celebration Cheese Ball Recipe
- Key Timing and Preparation Benchmarks
- Essential Components for Bold Flavor
- Necessary Tools for Easy Hosting
- Bringing It Together
- Managing Texture and Flavor Imbalances
- Creative Variations for Festive Platters
- Scaling for Large Gatherings
- Long-Term Freshness and Leftover Ideas
- Perfect Pairings for Weekend Brunch
- Debunking Kitchen Myths
- Recipe FAQs
- 📝 Recipe Card
Create the Ultimate Celebration Cheese Ball Recipe
Long before the modern charcuterie board took over our social feeds, the humble cheese ball was the undisputed monarch of the mid century party table. It carries a certain nostalgic weight, tracing its roots back to massive "social cheeses" in the early 1800s, but it truly found its stride in the 1940s and 50s.
I remember my grandmother’s kitchen during the holidays, where a massive cheddar sphere coated in pecans sat like a savory centerpiece next to the crystal punch bowl. It wasn't just food; it was a signal that the celebration had officially begun.
This particular cheese ball recipe honors that tradition while bringing in a smoky, modern punch that feels right at home at a breezy weekend brunch.
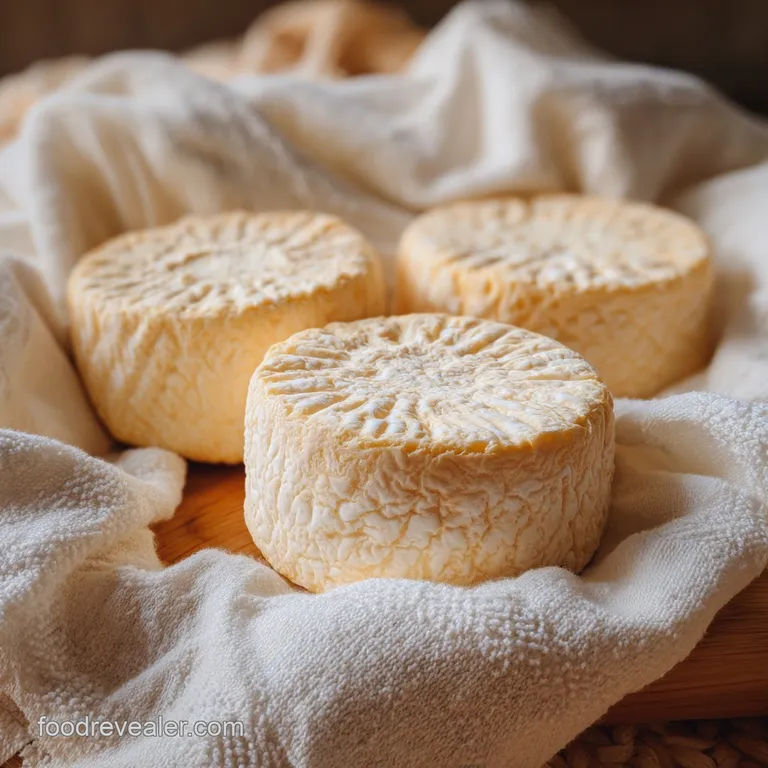
There is something deeply satisfying about the ritual of dragging a crisp cracker through a cold, firm cheese sphere. You get that initial resistance, then a smooth glide into the velvety center, all while the smoky aroma of paprika and toasted nuts hits your senses.
It’s a dish meant for sharing, designed to sit out while friends sip creative mimosas and catch up. We’ve all seen the store-bought versions that taste like refrigerated plastic, but once you make a version with freshly grated sharp cheddar and real bacon, there is simply no going back.
This is about creating a texture that holds its shape but melts the moment it hits your tongue.
In our house, the cheese ball is the ultimate hosting shortcut. It’s the anchor of the table, allowing you to focus on your guests rather than being stuck over a hot stove. Whether you're serving it alongside a Classic Cobb Salad or just a pile of crusty bread, it brings an air of effortless sophistication to the morning. We’re going to look at the physics of fat stabilization and how a simple two hour rest transforms a loose mixture into a sliceable masterpiece. Let's get into the details of making this festive icon.
Key Timing and Preparation Benchmarks
Fat Stabilization: Chilling the mixture for exactly 120 minutes allows the saturated fats in the cream cheese to re solidify, creating a structural lattice that holds the heavy cheddar and bacon in place.
Aeration Mechanics: Beating the base cream cheese before adding solids introduces tiny air pockets, ensuring the final texture is spreadable rather than dense or gummy.
Aromatic Infusion: The passive resting time isn't just for texture; it allows the garlic powder and Worcestershire sauce to hydrate and permeate the fat, deepening the savory profile.
Moisture Barrier: The pecan and bacon crust acts as a sacrificial layer, preventing the cheese from drying out or developing a skin while it sits on your brunch table.
| Preparation Stage | Target Time | Visual Checkpoint | Resulting Texture |
|---|---|---|---|
| Initial Whipping | 3 minutes | Smooth, no lumps | Silky and light |
| Mandatory Chilling | 120 minutes | Firm to the touch | Sliceable and stable |
| Final Coating | 2 minutes | Fully obscured cheese | Shattering and crunchy |
The chilling phase is the one step you cannot rush. I once tried to serve this after only thirty minutes because guests arrived early, and it was a disaster. The "ball" slowly slumped into a sad, cheesy puddle within twenty minutes of sitting out.
Giving it that full 120 minutes in the cold ensures it stays proud and spherical even in a warm room filled with people.
Essential Components for Bold Flavor
| Ingredient | Science Role | Pro Secret |
|---|---|---|
| Cream Cheese (450g) | Primary Emulsion | Use full fat blocks only for the best structural integrity and mouthfeel. |
| Sharp Cheddar (225g) | Structural Body | Grate it yourself; pre shredded cheese is coated in starch that prevents proper bonding. |
| Worcestershire (5ml) | Umami Catalyst | Adds depth without adding significant moisture, keeping the ball firm. |
| Toasted Pecans (60g) | Textural Contrast | Toast them for 5 minutes before chopping to release essential oils and maximize "shatter." |
Every single element in this cheese ball recipe serves a specific purpose in the architecture of the flavor. If you use low-fat cream cheese, you’ll find the water content is too high, leading to a "weeping" effect where moisture pools at the bottom of your serving platter.
We want a high fat to protein ratio here. The sharp cheddar provides the "bite" that cuts through the richness of the base, while the green onions provide a necessary hit of sulfurous brightness to wake up the palate.
When we talk about the crust, the bacon is non negotiable for that smoky, salty finish. It pairs beautifully with the earthy tones of the pecans and the freshness of the parsley. This trio creates a protective barrier that keeps the inner cheese velvety while offering a loud, satisfying crunch with every bite.
It’s the contrast that makes this dish addictive.
Necessary Tools for Easy Hosting
You don’t need an industrial kitchen to pull this off, but a few specific tools make the process much cleaner. A sturdy stand mixer or a high-quality hand mixer is essential for the first stage. You want to beat that cream cheese until it looks like thick frosting.
If you try to do this by hand with a cold block of cheese, you'll end up with lumps that never quite go away. I always recommend using a silicone spatula for the folding stage because it allows you to scrape the bottom of the bowl perfectly, ensuring every bit of cheddar is incorporated.
Plastic wrap is actually your most important structural tool here. It’s not just for covering; it’s for molding. By pulling the corners together and twisting, you create a pressurized environment that forces the cheese into a tight sphere.
This pressure helps the ingredients bond during the 120 minute chill. Without the wrap, you'd be trying to hand mold a sticky mess, which is a recipe for frustration.
- Electric Hand Mixer: Essential for aerating the cream cheese base.
- Large Glass Mixing Bowl: Provides enough space for folding without spilling.
- Box Grater: For that fresh, "clingy" cheddar texture.
- Heavy Duty Plastic Wrap: Used for both molding and stabilizing the shape.
- Small Skillet: To toast the pecans and crisp the bacon to perfection.
Bringing It Together
- Place the 450g of softened cream cheese in your mixing bowl and beat on medium speed for 3 minutes until it looks light and aerated. Note: This air is what makes it spreadable on soft bread.
- Add the 5ml of Worcestershire sauce, 2.5g of garlic powder, and 1.25g of smoked paprika. Mix until the color is a pale, uniform orange pink.
- Add the 225g of freshly grated sharp cheddar and 30g of finely chopped green onions.
- Fold the mixture gently using a spatula until the cheddar is evenly distributed. Note: Over mixing here can break the air bubbles you just created.
- Lay out a large sheet of plastic wrap and scoop the mixture into the center.
- Gather the edges of the wrap and twist the top until the cheese forms a firm, tight sphere.
- Transfer to the refrigerator and chill for 120 minutes until the ball feels solid when pressed.
- While the ball chills, combine the 60g of toasted pecans, 60g of crumbled bacon, and 10g of parsley in a shallow dish.
- Remove the chilled ball from the wrap and roll it through the nut mixture until the entire surface is heavily coated.
- Press the coating gently with your hands until the toppings are securely embedded in the cheese.
The magic happens in that final roll. You want to be aggressive with the coating. Don't just sprinkle it on; press the pecans and bacon into the surface so they form a true crust. This ensures that when someone takes a scoop, they get a piece of that "shattering" exterior along with the creamy center. If you're serving this at a brunch, it looks fantastic on a wooden board surrounded by Easy Focaccia Bread or salty crackers.
Managing Texture and Flavor Imbalances
Why Your Cheese Ball Is Too Soft
If your sphere looks more like a pancake, the most likely culprit is temperature. Cream cheese becomes very fluid if it gets too warm during the mixing process. If you find the mixture is too soft to even wrap in plastic, pop the whole bowl in the freezer for 10 minutes before attempting to mold it.
Also, ensure you aren't adding "wet" ingredients like fresh salsa or extra liquid sauces, as these will break the emulsion.
| Problem | Root Cause | Solution |
|---|---|---|
| Surface is "sweating" | Temp fluctuations | Chill for 30 mins before serving; keep away from sunlight. |
| Toppings falling off | Ball is too cold/dry | Let the ball sit at room temp for 5 mins before rolling in nuts. |
| Flavor is flat | Lack of acidity/salt | Increase Worcestershire or add a pinch of kosher salt. |
The key to a successful cheese ball recipe is the balance of fats. When the ball is cold, the fat is solid, which gives it that professional, rounded look. As it sits out, it will naturally soften, but the cheddar "skeleton" inside will help it maintain its dignity for several hours.
Preventing a Bland Profile
Cheese balls can sometimes suffer from being "just creamy." If yours tastes a bit one note, it usually means the cheddar wasn't sharp enough or you skipped the Worcestershire. The smoked paprika provides a subtle background hum that mimics the flavor of a wood fire, which is essential when pairing this with festive beverages.
Common Mistakes Checklist
- ✓ Always grate your own cheese to avoid the waxy coating on pre shredded bags.
- ✓ Don't skip the 120 minute chill; it's the difference between a ball and a dip.
- ✓ Pat the green onions dry after washing to prevent excess moisture.
- ✓ Toast your pecans; raw nuts can taste "dusty" in a cold application.
- ✓ Use a high-quality bacon that has been cooked until very crisp for better texture.
Creative Variations for Festive Platters
For a brunch setting, I often like to play with the flavor profile. If you want something a bit more vibrant, try a "Jalapeño Popper" version. Swap the smoked paprika for diced fresh jalapeños (seeds removed!) and use a Monterey Jack blend instead of just sharp cheddar.
The heat from the peppers cuts through the heavy cream cheese beautifully and pairs perfectly with a spicy Bloody Mary.
If you’re hosting a more refined afternoon gathering, you can go the "Sweet and Savory" route. Replace the bacon and green onions with dried cranberries and a hint of honey in the base. Keep the pecans for the crunch, but add some lemon zest to the parsley mixture.
It transforms the dish into something that feels much lighter and pairs elegantly with sparkling wine or a light mimosa.
- Pesto Variation: Mix 2 tablespoons of basil pesto into the cream cheese and roll in toasted pine nuts.
- Everything Bagel: Use "everything" seasoning instead of pecans and bacon for a classic breakfast feel.
- Blue Cheese Kick: Replace 1/4 of the cheddar with crumbled gorgonzola for a funky, sophisticated edge.
| Method | Time | Texture | Best For |
|---|---|---|---|
| Classic Chill | 120 minutes | Firm, sliceable | Formal hosting, platters |
| Rapid Freeze | 30 minutes | Soft, scoopable | Last minute guests, dips |
| Overnight Set | 8 hours | Very dense, bold | Meal prep, traveling |
Scaling for Large Gatherings
When you're hosting a big crowd, you might be tempted to just make one massive, basketball sized cheese ball. Trust me, don't do it. A giant cheese ball is hard to eat, looks messy quickly, and is difficult to chill evenly. Instead, double the recipe and make two medium sized balls.
This allows you to put one out at the start of the brunch and keep the second one perfectly chilled in the fridge, ready to swap in when the first one starts to look a bit "well loved."
If you need to scale down for an intimate morning for two, just halve everything. Use one 8oz (225g) block of cream cheese and follow the same ratios. You can use a smaller bowl for mixing, but still use the plastic wrap trick to get that tight shape.
For small batches, the chilling time can be reduced to about 60 minutes since the smaller mass cools down much faster.
Long Term Freshness and Leftover Ideas
This is one of the few appetizers that actually improves with a little bit of time. You can make the cheese ball (without the crust) up to three days in advance. Just keep it tightly wrapped in the fridge. I recommend waiting until about an hour before serving to roll it in the pecan and bacon mixture.
This ensures the nuts stay crunchy and the bacon doesn't lose its snap from the moisture in the cheese.
- Storage: Keep in an airtight container in the fridge for up to 5 days.
- Freezing: While you can freeze the cheese base, the texture of the cheddar can become slightly grainy. I don't recommend freezing the fully assembled ball.
- Zero Waste: If you have leftover cheese ball, don't toss it! It makes an incredible spread for a roast beef sandwich or can be stirred into hot pasta for a quick, smoky mac and cheese style sauce.
Perfect Pairings for Weekend Brunch
Serving this is all about the "vehicle." I love a mix of textures sturdy pita chips, buttery crackers, and thin slices of apple or pear. The fruit provides a crisp, juicy contrast to the heavy cheese that is absolutely refreshing during a morning meal.
If you're feeling ambitious, serve it with warm bread rounds that have been brushed with olive oil and sea salt.
For drinks, think about balance. Since the cheese ball is rich and savory, you want something with high acidity to cleanse the palate. A classic mimosa with a splash of cranberry (a Poinsettia) works wonders, or even a simple dry Prosecco.
The bubbles help "lift" the fat off the tongue, making every bite of this cheese ball recipe feel just as exciting as the first one.
The Classic Cracker Spread
Nothing beats the traditional water cracker or a "club" style cracker. They are neutral enough to let the sharp cheddar and smoky bacon shine without competing for attention.
The Sweet & Salty Pairing
Try serving this with honey drizzled crostini. The touch of sweetness from the honey bridges the gap between the savory bacon and the earthy pecans, creating a complex flavor profile that guests will keep coming back for.
Debunking Kitchen Myths
A common misconception is that you should serve a cheese ball at room temperature. People think it will be easier to spread, but in reality, a room temp cheese ball loses its structural integrity and can taste overly "greasy" as the fats begin to separate.
The best way to serve it is cold, straight from the fridge, or having sat out for no more than 15 minutes. The friction of the cracker or knife will provide enough heat to make it spreadable while keeping the core refreshing.
Another myth is that you can't use "strong" cheeses. Some people worry that a sharp cheddar will overwhelm the cream cheese. In fact, you need that sharpness. Because the cream cheese is so neutral and fatty, it acts as a mute for other flavors.
If you use a mild cheese, the final product will taste like nothing but plain cream. Don't be afraid of the "extra sharp" label; it’s what gives this dish its soul.

Recipe FAQs
What are the ingredients of cheese ball?
The base requires 16 oz of softened cream cheese, 2 cups of freshly grated sharp cheddar, 1/4 cup of chopped green onions, 1 tsp of Worcestershire sauce, 1/2 tsp of garlic powder, and 1/4 tsp of smoked paprika.
The exterior crust consists of 1/2 cup of toasted pecans, 4 slices of crumbled bacon, and 2 tbsp of minced parsley.
What are some common cheese ball mistakes?
Using pre-shredded bagged cheese is a major error because the added anti caking agents prevent the cheese from binding properly into a cohesive ball. Always grate your sharp cheddar fresh to ensure the correct texture and flavor profile.
Should you make a cheese ball the night before?
Yes, preparing it the night before is actually ideal. Letting it rest in the refrigerator for at least 2 hours allows the fats to stabilize and the savory seasonings to fully meld, resulting in a much better flavor.
What is the best cheese for a cheese ball?
Sharp cheddar is the best choice because its bold, tangy profile cuts through the richness of the cream cheese. If you enjoyed learning how to balance sharp and creamy flavors here, see how that same principle works in our Classic Bruschetta Recipe.
How to ensure the cheese ball holds its shape?
Scoop the mixture onto a large sheet of plastic wrap and twist the corners tightly to compress the ball into a firm sphere. Refrigerating for the full 2 hours is essential for the structure to set properly before you apply the crust.
How to get the crust to stick to the cheese?
Remove the cheese ball from the plastic wrap once it is fully chilled and firm. Press the ball gently into the mixture of pecans, bacon, and parsley, rolling it slowly until the entire exterior is coated in a thick, uniform layer.
Is it true I must leave the cheese ball out for hours before serving?
No, this is a common misconception. You can serve the cheese ball immediately after rolling it in the crust, or keep it in the refrigerator until you are ready to entertain guests.
Classic Homemade Cheese Ball
Ingredients:
Instructions:
Nutrition Facts:
| Calories | 268 calories |
|---|---|
| Protein | 8.9 g |
| Fat | 24.6 g |
| Carbs | 3.2 g |
| Fiber | 0.8 g |
| Sugar | 1.5 g |
| Sodium | 385 mg |
