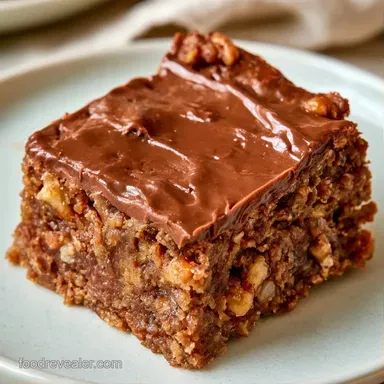
Chocolate Date Nut Bars with Dark Chocolate
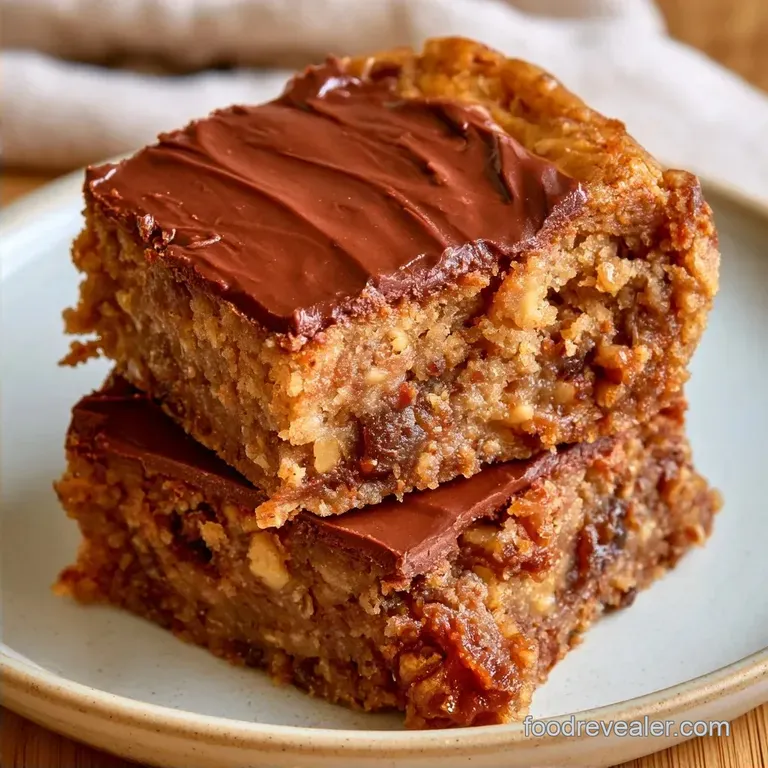
- Time: 10 min active + 2 hours chilling
- Flavor/Texture Hook: A crisp dark chocolate shell over a chewy, nutty foundation
- Perfect for: Mid-afternoon energy dips or a simple healthy dessert
The aroma of melting dark chocolate is always the highlight for me; it's the best part of the whole experience. I used to buy those "natural" energy bars from the store the ones that cost four dollars each and taste like sweetened cardboard.
I eventually grew tired of paying a premium for what felt like a chewy block of preservatives.
I wanted something that tasted like real food. These Chocolate Date Nut Bars are the answer. They are rich, salty, and have that specific chewiness that mimics a candy bar, even though they consist mostly of fruit and nuts.
You can expect a treat that feels decadent but won't lead to a sugar crash. It's a simple process that requires almost no actual "cooking," just a few pulses in the food processor and a little patience while they set in the fridge.
Chocolate Date Nut Bars Specs
First, the fundamentals. Since this is a no-bake treat, you can forget about preheating the oven or stressing over burnt edges. Your only real work is firmly pressing the base into your tin.
Most of the process is simply patience. Once the layers are assembled, the refrigerator takes over. Resist the urge to slice these before two hours have passed, or you'll have a chocolatey disaster rather than precise squares. Believe me, waiting ensures that perfect chocolate snap.
You'll only need a handful of simple ingredients to make 12 bars. This is the perfect opportunity to clear out any dates lingering in your cupboard.
Why These Bars Work
I'm always curious about why some no bake recipes hold together and others just crumble. It comes down to a couple of simple things in this recipe.
The Date Binder: Medjool dates are naturally high in sugar and fiber. When you pulse them, they turn into a thick, sticky paste that acts as a natural adhesive. This holds the walnuts in place without needing flour, eggs, or corn syrup.
The Oil Addition: Pure dark chocolate can be very brittle when cold. Adding a small amount of coconut oil changes the structure of the chocolate, making it smoother and less likely to crack into a million pieces when you slice into the bars.
Texture Balance: The contrast between the soft, caramel like dates and the chunky walnuts creates a structural variety. This prevents the bars from feeling like a single, dense block of sugar.
The Main Components
Before we get into the full list, here is a breakdown of what each part does.
| Ingredient | Role | If You Don't Have It |
|---|---|---|
| Medjool Dates | Natural binder and sweetener | Deglet Noor dates (soak them first) |
| Walnuts | Adds crunch and healthy fats | Almonds or Cashews |
| Dark Chocolate | Provides the rich, firm topping | Semi sweet chips (will be sweeter) |
| Coconut Oil | Prevents chocolate from cracking | Cocoa butter or refined coconut oil |
The choice of Medjool dates is a big deal here. They are larger and softer than other varieties, which makes the base much more cohesive. If you use the smaller, drier dates, you'll notice the mixture doesn't stick together as easily.
Tools You'll Need
This recipe is straightforward and doesn't require any specialty equipment just a few staples most of us already own.
A food processor is practically essential here. You can chop the ingredients by hand, but you won't achieve that sticky, paste like consistency with the dates without a blade. A small 6-cup processor is plenty for this batch.
You will want an 8x4 inch loaf pan. If a square pan is all you have, that's okay, but your bars will be thinner and might set more quickly. I always line my pan with parchment paper, leaving a few inches of overhang to make lifting the entire block out effortless.
Lastly, have a microwave safe bowl ready for the chocolate. A double boiler is a great alternative if you're worried about burning the chocolate, but 30-second bursts in the microwave usually do the trick for me.
How to Make Them
Let's crack on with the actual build. Make sure your dates are pitted before you start, or you'll have some very unpleasant surprises in your bars.
- Place the pitted dates in the food processor. Pulse several times until they form a thick, sticky paste.
- Add the walnuts and 1/4 tsp fine sea salt to the processor. Pulse a few more times until the nuts are broken into small pieces but still have some crunch.
- Line your 8x4 inch loaf pan with parchment paper, leaving an overhang. Transfer the date nut mixture into the pan.
- Press the mixture down firmly with a spoon or a flat cup until the surface is level and tightly packed. Note: If the base isn't packed tight, the bars will crumble when you cut them.
- Put the dark chocolate chips and 1 tbsp coconut oil in a microwave safe bowl. Heat in 30 second intervals, stirring in between, until the mixture is smooth and glossy.
- Stir in 1/4 tsp vanilla extract.
- Pour the chocolate over the nut layer. Spread it evenly to the edges using a spatula.
- Sprinkle 1/2 tsp flaky sea salt over the top.
- Place the pan in the refrigerator. Chill for at least 2 hours until the chocolate is firm and doesn't smudge.
- Lift the bars out using the parchment paper. Use a sharp knife to slice them into 12 equal bars.
Fixes for Common Issues
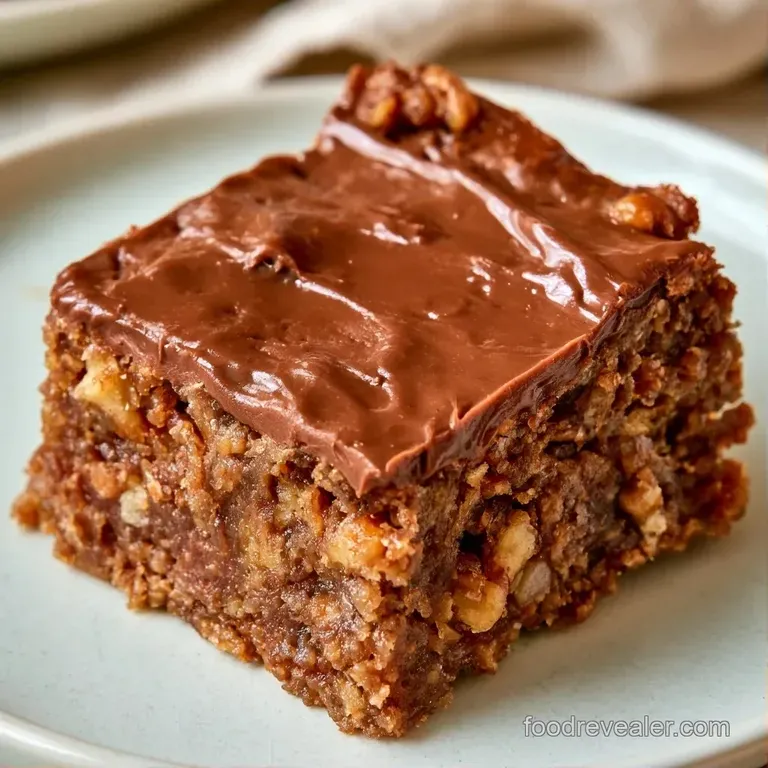
Not every batch is perfect, even with a straightforward process. Here are some common mishaps I've encountered and the solutions that worked.
Date mixture too crumbly
If your dates are dry or past their prime, they might not bond with the nuts, resulting in a texture like wet sand rather than a cohesive dough. To resolve this, soak the pitted dates in hot water for about 10 minutes. After draining and patting them dry with a paper towel, process them again.
This restores the sugars and makes them sticky.
Chocolate cracking when slicing
Brittle chocolate or a blunt knife often causes the bars to crack. For cleaner cuts, allow the bars to reach room temperature for roughly 5 minutes before slicing. Additionally, dip your knife in hot water and wipe it clean between slices; this allows the blade to glide through the chocolate. If they remain too brittle, try increasing the coconut oil in your next batch. For more chocolatey treats, check out my fudgy sourdough brownies.
Chocolate topping too thick
If the coconut oil isn't fully blended, the topping may be too thick to spread easily. Avoid continuing to microwave it on high to prevent scorching the cocoa. Instead, stir in one additional teaspoon of coconut oil vigorously. The residual heat from the chocolate should melt the oil, making the mixture pourable.
Different Flavor Twists
After mastering the basic recipe, feel free to experiment with the flavors. The date and nut foundation is incredibly versatile.
Switch out the walnuts for toasted pecans or almonds to change the profile. Almonds provide a firmer snap, whereas pecans offer a buttery richness that complements the dark chocolate. For a tropical twist, try macadamias combined with a pinch of cinnamon in the base.
You can also vary the chocolate choice. Pairing a white chocolate layer with dried cranberries in the base is perfect for the festive season. To make the treat even more indulgent, blend in a tablespoon of almond butter with the dates before pressing them into the pan; this results in a richer, fudge like consistency. If you have extra walnuts, my banana nut bread is another delicious option.
To reduce the sugar content, opt for chocolate with 85% or 90% cocoa. While it's more bitter, the dates provide a natural sweetness to balance it. For added texture and a dose of omega-3s, toss a tablespoon of chia seeds into the food processor.
Keeping Them Fresh
Since there's no baking involved, these bars stay fresh for a surprisingly long time if you store them right.
Keep them in an airtight container. I usually line the container with parchment paper between layers so they don't stick together. They'll stay good in the fridge for about 2 weeks. If you aren't planning to eat them that quickly, throw them in the freezer.
They last for up to 3 months in the freezer , honestly, they taste great eaten straight from the freezer - they get a bit more like a frozen candy bar.
To avoid waste, if you have any leftover date paste that didn't make it into the pan, don't toss it. Roll it into tiny balls and roll them in cocoa powder or shredded coconut for mini "energy bites." If you have a few stray walnuts, toast them in a pan for 3 minutes and toss them into your morning yogurt.
Best Ways to Serve
These bars are incredibly versatile, and your serving choice can change depending on the hour.
For a morning boost, I enjoy pairing a bar with a bold cup of black coffee, as the coffee's intensity complements the rich dates. If you're presenting them as a dessert, place one on a small plate with a few fresh raspberries; the tartness of the fruit perfectly offsets the deep chocolate notes.
They also work wonderfully in a lunchbox. Simply wrap them individually in wax paper to avoid any smudging. For a small gathering, try arranging them on a wooden board alongside sliced apples and a piece of brie cheese. That salty sweet pairing is always a favorite.
The Building Blocks
I want to make sure you have the exact amounts. I've used a mix of volume and weight because some of us prefer a scale.
- 1 cup (200g) Medjool dates, pitted
- 1 cup (120g) Walnuts
- 1/4 tsp (1g) Fine sea salt
- 1 cup (175g) Dark chocolate chips (70% cocoa or higher)
- 1 tbsp (15ml) Coconut oil, virgin
- 1/4 tsp (1g) Vanilla extract
- 1/2 tsp (3g) Flaky sea salt
If you're swapping the walnuts for another nut, keep the weight the same (120g). If you're using a different chocolate, like a bar instead of chips, just chop it up finely so it melts evenly in the microwave.
Quick Win Comparison
I often get asked if it's better to make these or just buy a "healthy" bar from the store. Here is how they actually stack up.
| Feature | store-bought "Healthy" Bar | Homemade Date Nut Bars |
|---|---|---|
| Ingredients | Often contain soy lecithin/syrups | Dates, nuts, cocoa |
| Texture | Sometimes dry or rubbery | Chewy base, crisp topping |
| Cost | Expensive per unit | Cheap bulk ingredients |
The biggest win is knowing exactly what's inside. No mystery oils or artificial sweeteners.
Common Kitchen Myths
Some common misconceptions exist regarding no-bake desserts.
One widely held belief is that you must "temper" your chocolate to ensure it sets properly. While this is standard for professional pralines, adding a splash of coconut oil is a simple shortcut for home snacks. It ensures the chocolate has a pleasant bite without requiring a degree in food science.
Another mistake is believing you need a specialized "energy" chocolate brand. Any dark chocolate with a high cocoa content is suitable. Interestingly, budget store brand chips often melt more reliably than some premium artisanal bars that contain more stabilizers.
Finally, some assume these bars aren't "healthy" because they contain chocolate. The key is the percentage; using cocoa that is 70% or higher significantly cuts the sugar and boosts antioxidants. It's a matter of balance, not restriction.
Decision Shortcut
- For a firmer set: chill 3 hours instead of 2.
- For a saltier finish: double the flaky sea salt on top.
- For a softer base: add 1 tbsp of water to the date pulsing stage.
Recipe FAQs
How to soften dates if they are too dry?
Soak them in hot water for 10 minutes and drain well.
Tip: Pat them dry with a paper towel to prevent the base from becoming too mushy.
Can I use almonds instead of walnuts?
Substitute raw or roasted almonds for a firmer crunch.
Tip: If you enjoy balancing nutty textures, see how we use similar richness in our coconut praline sauce.
Is it true that these bars must be baked to set?
This one's false: The natural stickiness of Medjool dates and the chilled chocolate create a firm structure without heat.
Tip: Press the date mixture into the pan very firmly to avoid air gaps.
Why did my chocolate layer look grainy?
Overheating the chocolate in the microwave typically causes it to seize.
Tip: Use 30-second intervals and stir thoroughly after each burst.
What's the best way to get clean slices?
Dip a sharp knife in hot water and wipe it dry between every cut.
Tip: Wait for the full two-hour chill time to ensure the chocolate snaps.
How to prevent the bars from sticking to the pan?
Line the 8x4 inch loaf pan with parchment paper and leave an overhang on the sides.
Tip: Use the paper edges to lift the entire block out before slicing.
Could I use milk chocolate instead of dark?
Swap the dark chips for milk chocolate for a sweeter, creamier profile.
Tip: Extend the refrigeration time if the bars feel too soft to hold.
Chocolate Date Nut Bars