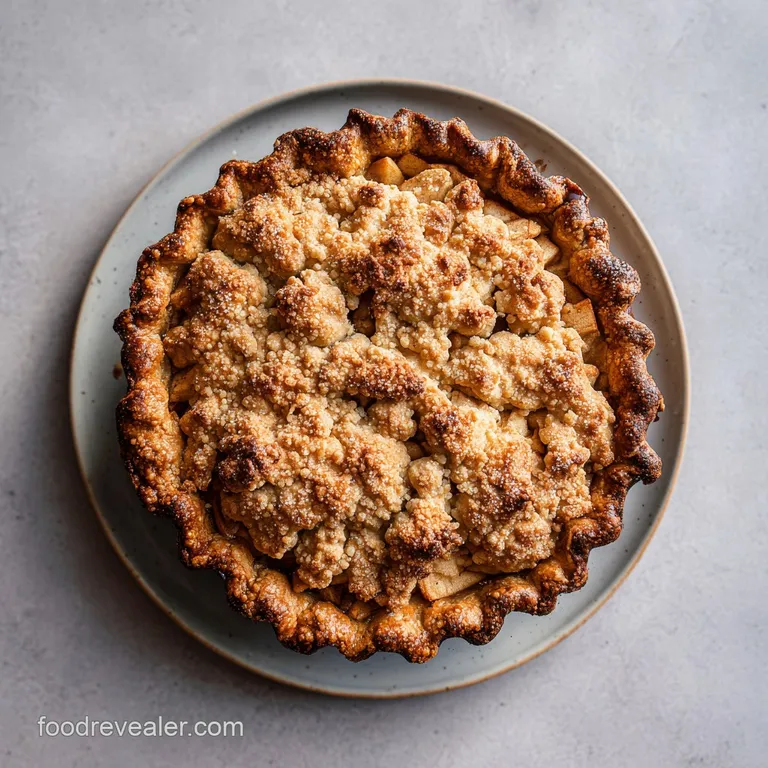
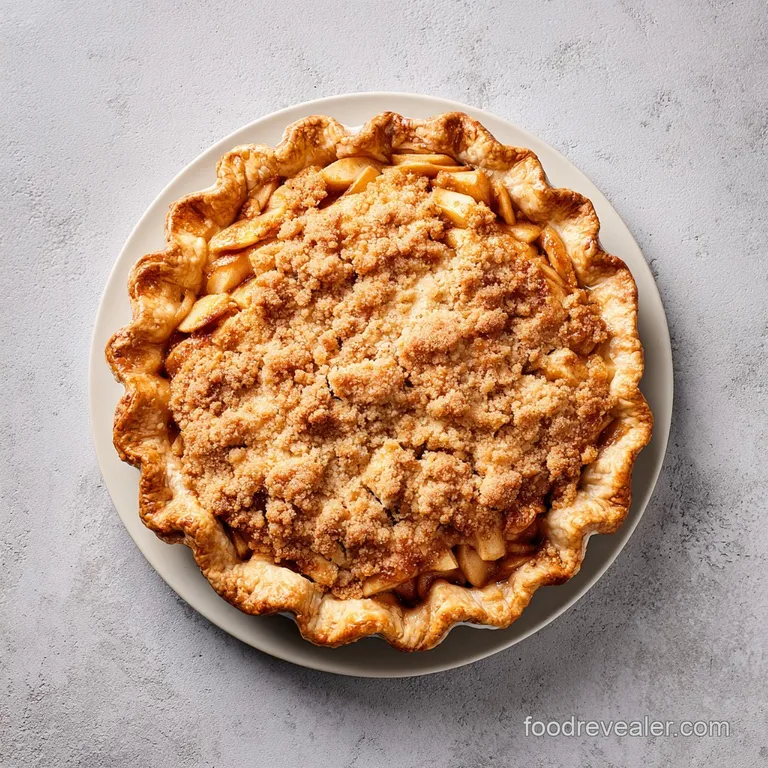
Dutch Apple Pie: Flaky Crust and Crunchy Topping
- Time: Active 45 minutes, Passive 55 minutes, Total 100 minutes
- Flavor/Texture Hook: Flaky, buttery crust meets a syrupy apple center with a crunchy, nutty finish.
- Perfect for: Holiday gatherings, Sunday family dinners, or whenever you need a house that smells like autumn.
- Master the Ultimate Homemade Dutch Apple Pie
- Why These Spiced Layers Work So Well
- Sourcing the Best Components for Success
- Essential Tools for a Flawless Golden Bake
- A Step-by-Step Path to Pie Perfection
- Avoiding Mistakes for a Better Result
- Creative Ways to Mix Up Your Filling
- Storing and Freezing for Later Enjoyment
- The Best Complements for Your Slice
- Recipe FAQs
- 📝 Recipe Card
Master the Ultimate Homemade Dutch Apple Pie
Forget everything you have been told about needing a double crust to keep your fruit moist and tender. There is a common myth in the baking world that without a top layer of pastry, your apples will dry out or turn into a rubbery mess before the crust even sees a hint of gold.
Honestly, I used to believe that too, until I pulled my first "naked" pie out of the oven and realized that a heavy blanket of streusel actually does a much better job of trapping steam while adding a texture that a standard crust just cannot touch.
The first time I attempted this, the aroma of toasted pecans and bubbling brown sugar hit me before I even opened the oven door. I remember standing there, watching the juices dance around the edges of the pan, and the way the topping had transformed into these beautiful, mahogany colored pebbles.
It was not just a dessert; it was a sensory experience that felt like a warm hug on a cold afternoon. You do not need fancy equipment or a pastry degree to get this right, just a bit of patience and some very cold butter.
We are going for layers of flavor here. Most people just toss apples with sugar and call it a day, but we are going to let those apples macerate, drawing out the juices to create a natural syrup that thickens as it bakes. This ensures that every bite is silky and rich, rather than watery.
If you have ever sliced into a pie only to have a puddle of grey liquid run across the plate, you know exactly why this extra step matters. We are building something hearty and reliable that will satisfy the soul.
Why These Spiced Layers Work So Well
Building a great dessert is all about managing moisture and fat, and this particular method excels at both. By focusing on how the ingredients interact during that 55 minutes in the heat, we ensure the bottom stays crisp while the top gets that signature snap.
- Cold Fat Physics: Using frozen butter in the base ensures that when it hits the 375°F oven, the water in the butter evaporates instantly, creating tiny steam pockets that lift the flour into flaky, shattered layers.
- Enzymatic Softening: The lemon juice does more than just add a tangy bite; it helps break down the pectin in the apples just enough so they soften without losing their shape entirely.
- Osmotic Draw: Tossing the apples in sugar before baking pulls the internal moisture out, allowing the 2 tablespoons of flour in the filling to create a thick, velvety glaze right on the fruit surface.
- Nutty Insulation: The pecans in the Dutch topping act as little heat shields, preventing the sugars in the crumble from burning while adding a toasted, savory depth that balances the sweetness.
| Thickness | Internal Temp | Rest Time | Visual Cue |
|---|---|---|---|
| 1/4 inch slices | 195°F (90°C) | 2 hours | Filling bubbles slowly like lava |
| 1/2 inch chunks | 200°F (93°C) | 3 hours | Crumble is dark mahogany brown |
| Thicker Wedges | 205°F (96°C) | 4 hours | Juices are clear and syrupy |
When you are deciding on your apple prep, remember that thinner is generally better for that "melt in-your mouth" texture. If you slice them too thick, you risk a "crunchy" center which can feel jarring against the soft pastry.
I prefer the 1/4 inch approach because it allows the fruit to slump together into a cohesive, spiced mass that holds its shape perfectly when you finally go in for a slice.
Sourcing the Best Components for Success
Selecting your ingredients is where the heart of the flavor begins. You cannot just grab any old bag of apples and expect greatness; you need a fruit that can stand up to the heat without turning into applesauce.
I always reach for Granny Smiths because their high acidity provides a sharp contrast to the sugary crumble, but Honeycrisps are a fantastic alternative if you want a bit more natural sweetness.
| Component | Science Role | Pro Secret |
|---|---|---|
| Frozen Butter | Steam production | Grate it while frozen for even distribution |
| Lemon Juice | Pectin control | Use fresh only to prevent a "bottled" aftertaste |
| Pecans | Texture & Fat | Toast them for 3 minutes before adding to crumble |
| Brown Sugar | Humectant | Pack it tightly to ensure deep molasses notes |
The salt in the crust is another one of those small things that makes a massive difference. It does not just make things salty; it actually strengthens the gluten structure just enough to make the dough easier to roll without it tearing apart.
It also acts as a flavor enhancer for the butter, making the whole base taste richer and more complex.
For the dry elements, we are using 1.5 cups of all purpose flour for the crust and another 1 cup for the topping. This provides the structural skeleton for the entire dish. The 0.33 cup of granulated sugar in the topping gives it a crisp, crystalline snap, while the light brown sugar adds that chewy, toffee like moisture that we all crave in a good Dutch topping.
| Original Ingredient | Substitute | Why It Works |
|---|---|---|
| Unsalted Butter | Salted Butter | Works fine; just omit the extra sea salt in the crust. |
| Granny Smith | Braeburn Apples | Holds shape well with a slightly more floral aroma. |
| Pecans | Walnuts | Adds a slightly bitter, earthy note that cuts sweetness. |
| Light Brown Sugar | Dark Brown Sugar | Adds more molasses flavor; the topping will be darker. |
If you are out of fresh lemons, you could use a teaspoon of apple cider vinegar in a pinch. It provides the necessary acidity to keep the fruit colors bright and the flavors popping, though it won't have that specific citrus brightness.
Just avoid using "cooking apples" like McIntosh, as they have a high water content and will likely lead to a soggy bottom.
Essential Tools for a Flawless Golden Bake
You do not need a kitchen full of gadgets, but a few specific items will make your life significantly easier. A deep dish pie plate is non negotiable here because we are packing in 3 lbs of apples. If you try to use a standard shallow tin, you will have a syrupy mess all over the floor of your oven.
I also highly recommend using a food processor for the crust; it keeps the butter cold by minimizing the contact with your warm hands.
Chef Tip: Always bake your pie on a rimmed baking sheet. This catches any bubbling juices that might escape, saving you from a smoky kitchen and a localized fire alarm situation.
A pastry cutter is great for the topping if you do not want to pull out the food processor again. You want "varied clump and crumble textures," which means some pieces should be the size of peas while others are as large as marbles.
This variation is what creates those craggy, mountain like peaks that catch the heat and turn extra crispy.
A step-by-step Path to Pie Perfection
- Prepare the crust by pulsing 1.5 cups flour, 0.5 tsp salt, and 0.5 cup frozen, cubed butter. Note: Stop when the fat looks like small peas; over mixing leads to a tough, cracker like base.
- Gradually add 4 tbsp ice water, one tablespoon at a time, until the dough just holds together when squeezed.
- Form the dough into a disk, wrap it tightly in plastic, and chill in the fridge for at least 30 minutes. Wait until the dough is firm and cold.
- Prepare the filling by tossing 3 lbs of sliced apples with 100g granulated sugar, 50g brown sugar, 2 tbsp flour, 1 tbsp lemon juice, 1.5 tsp cinnamon, and nutmeg.
- Let the apple mixture sit for 15 minutes to macerate. Look for the liquid pooling at the bottom.
- Make the Dutch topping by combining 1 cup flour, 100g brown sugar, 65g granulated sugar, and 1 tsp cinnamon.
- Cut in 0.5 cup cold butter until it forms varied clumps, then stir in 0.5 cup chopped pecans.
- Roll out the chilled dough on a floured surface and fit it into a 9 inch deep dish plate, crimping the edges as you like.
- Pour in the apples and all their accumulated juices, then pile the topping evenly over the fruit.
- Bake at 375°F (190°C) for 55 minutes until the topping is mahogany brown and the filling is bubbling thick.
During that final 10 minutes of baking, the smell in your kitchen will be absolutely intoxicating. That is the cinnamon and the pecan oils working together. Don't be tempted to pull it out early; that bubbling action is the flour in the filling finally hydrating and thickening the juices.
If it is not bubbling, the inside will be runny when you cut it.
Avoiding Mistakes for a Better Result
The most heartbreaking moment for any baker is pulling out a beautiful pie only to realize the bottom is as soft as a wet noodle. This usually happens because the oven wasn't hot enough or the apples weren't drained slightly.
By macerating the fruit and adding that 2 tablespoons of flour to the filling, we create a barrier that keeps the crust crisp.
Why Your Crust Is Soggy
This is almost always a temperature issue. If your butter melts before the flour sets, you lose all those flaky layers and end up with a greasy, dense bottom. Make sure your oven is fully preheated to 375°F (190°C) before the pie goes in.
Also, avoid using a ceramic dish if you can; glass or metal conducts heat much faster, ensuring the bottom cooks at the same rate as the top.
| Problem | Root Cause | Solution |
|---|---|---|
| Runny Filling | Underbaked or no flour | Bake until juices bubble thick; add more flour next time. |
| Burnt Topping | Too close to heat | Tent with foil after 40 minutes if browning too fast. |
| Shrinking Crust | Dough was stretched | Let the dough "slump" into the pan without pulling it. |
- ✓ Use frozen butter for the crust to ensure maximum flakiness.
- ✓ Do not skip the maceration step; it controls the final moisture level.
- ✓ Always use a deep dish pan to avoid overflows.
- ✓ Let the pie cool for at least 2 hours before slicing to set the filling.
- ✓ Toast your pecans for a few minutes before adding to the topping for extra crunch.
Why Your Crumble Melted
If your topping looks like a flat sheet of sugar instead of distinct pebbles, your butter was likely too warm. When the butter is soft before it hits the oven, it just blends with the flour and sugar and spreads out. Always keep your crumble in the fridge until the very second you are ready to put it on the pie.
If your kitchen is hot, you can even pop the crumble in the freezer for 10 minutes to be safe.
Creative Ways to Mix Up Your Filling
While the classic is hard to beat, sometimes you want to experiment with different flavor profiles. For instance, you could swap out the pecans for walnuts or even toasted almonds.
If you are a fan of that salty sweet combo, a drizzle of salted caramel over the apples before you add the topping will take this to a whole new level.
If you are feeling adventurous, adding a handful of dried cranberries or golden raisins to the apple mixture adds a chewy contrast that works beautifully with the soft fruit. If you’re looking for a different kind of handheld treat, you might want to try these Smores Whoopie Pies which offer a completely different but equally satisfying texture profile.
Infusing Salted Caramel
To do this correctly, reduce the granulated sugar in the filling by half and replace it with 1/3 cup of thick caramel sauce. This adds a velvety, buttery richness that makes the apples taste like they came from a high end candy shop.
Just be careful not to use a "syrup" meant for coffee; you need a proper, thick dessert sauce that won't make the filling too liquid.
Going gluten-free
This recipe is surprisingly easy to adapt. You can use a 1:1 gluten-free flour blend (look for one that includes xanthan gum) for both the crust and the topping. Since gluten-free dough can be a bit more brittle, I recommend rolling it out between two sheets of parchment paper to make the transfer to the pie plate easier.
The crumble topping actually works brilliantly with gluten-free flour because we aren't looking for a lot of structural integrity there just crunch.
| Servings | Ingredient Adjustments | Pan Size | Cook Time |
|---|---|---|---|
| 4 people | Half all ingredients; use 1 egg yolk in crust | 6 inch deep dish | 40 minutes |
| 8 people | Use Schema quantities exactly | 9 inch deep dish | 55 minutes |
| 16 people | Double ingredients; make two pies | Two 9 inch dishes | 60 minutes |
When scaling up, try not to double the spices exactly. Spices like nutmeg and cinnamon can become overwhelming if you just 2x the volume. I usually go for about 1.5x the spice amount when doubling a recipe to keep the flavors balanced and not let the cloves or nutmeg dominate the delicate apple flavor.
Storing and Freezing for Later Enjoyment
One of the best things about this dessert is that it actually tastes better the next day. As it sits, the spices have more time to penetrate the fruit, and the juices turn into a thick, jam like consistency.
You can leave it on the counter for about 24 hours, but after that, it really should go into the fridge to keep the fruit fresh.
If you have a lot of leftover apples, don't throw them away. You can sauté them in a little butter and cinnamon to make a quick topping for oatmeal or yogurt the next morning. For those times when you want the flavor of apple pie but don't want to go through the whole baking process, this Apple Pie Cake is an amazing shortcut that still hits those comfort notes.
- Storage: Keep in the fridge for up to 4 days. Cover it loosely with foil or plastic wrap once it has cooled completely.
- Freezing: You can freeze the baked pie for up to 3 months. Wrap it in two layers of plastic wrap and one layer of heavy duty foil.
- Reheating: To get that crumble crispy again, skip the microwave. Put a slice in a 350°F (180°C) oven for about 10 minutes. This revives the butter in the topping and makes it taste like it was just baked.
The Best Complements for Your Slice
A warm slice of Dutch Apple Pie is a masterpiece on its own, but the right pairing can elevate it to a legendary status. The classic choice is, of course, a big scoop of high-quality vanilla bean ice cream.
The way the cold cream melts into the warm, spiced apple crevices creates a sauce of its own that is truly hard to beat. If you want something a bit less sweet, a dollop of unsweetened whipped cream with a pinch of cinnamon is a sophisticated alternative.
For those who like a bit of a savory twist, try a thin slice of sharp cheddar cheese on the side. It sounds strange if you haven't tried it, but the saltiness of the cheese cuts through the sugar and brings out the earthy notes of the pecans.
It’s a very traditional way to eat pie in many parts of the country, and for good reason it satisfies every part of the palate.
If you’re planning a full comfort food evening, this pie follows beautifully after a Chicken Pot Pie. There is something deeply satisfying about a "pie themed" dinner, starting with a savory, flaky crust and ending with this sweet, spiced version. It makes for a cohesive, hearty meal that feels like a real celebration of home cooking. Just make sure you have plenty of coffee or a glass of cold milk ready for the final course!

Recipe FAQs
What is the difference between Dutch apple pie and apple pie?
The primary difference is the crust. A traditional apple pie is covered with a second layer of pastry, while a Dutch apple pie features a crumbly, buttery streusel topping instead.
Which pie is best for diabetics?
No pie is inherently diabetic friendly. Because this recipe contains a significant amount of sugar and flour, it is not suitable for a diabetic diet regardless of the topping style used.
What makes it a Dutch apple pie?
The streusel topping is what defines this style. By combining flour, brown sugar, granulated sugar, cinnamon, cold butter, and pecans, you create a textured, crunchy layer that contrasts with the soft apples.
Is it true I must cook this pie at a higher temperature than 375°F?
No, this is a common misconception. You must bake the pie at exactly 375°F (190°C) for 55 minutes to ensure the filling reaches a jam-like consistency without burning the sugar in the topping.
How to achieve the perfect crumbly texture for the Dutch topping?
Cut the cold, cubed butter into the flour and sugar mixture until you see varied, pebble sized clumps. If you enjoyed mastering this specific fat-to-flour ratio technique here, you will find similar principles of texture control helpful when preparing our quick sourdough bread.
How to tell if the pie is fully cooked?
Look for bubbling filling and a deep mahogany brown color on the topping. These visual cues confirm that the juices have thickened and the streusel has caramelized sufficiently.
Is it necessary to macerate the apples?
Yes, macerating is essential to prevent a soggy bottom crust. Tossing the apples with sugar, flour, lemon juice, cinnamon, and nutmeg draws out excess moisture before the pie enters the oven.
Classic Dutch Apple Pie

Ingredients:
Instructions:
Nutrition Facts:
| Calories | 629 kcal |
|---|---|
| Protein | 5.3 g |
| Fat | 28.7 g |
| Carbs | 91.2 g |
| Fiber | 5.2 g |
| Sugar | 53.8 g |
| Sodium | 147 mg |
