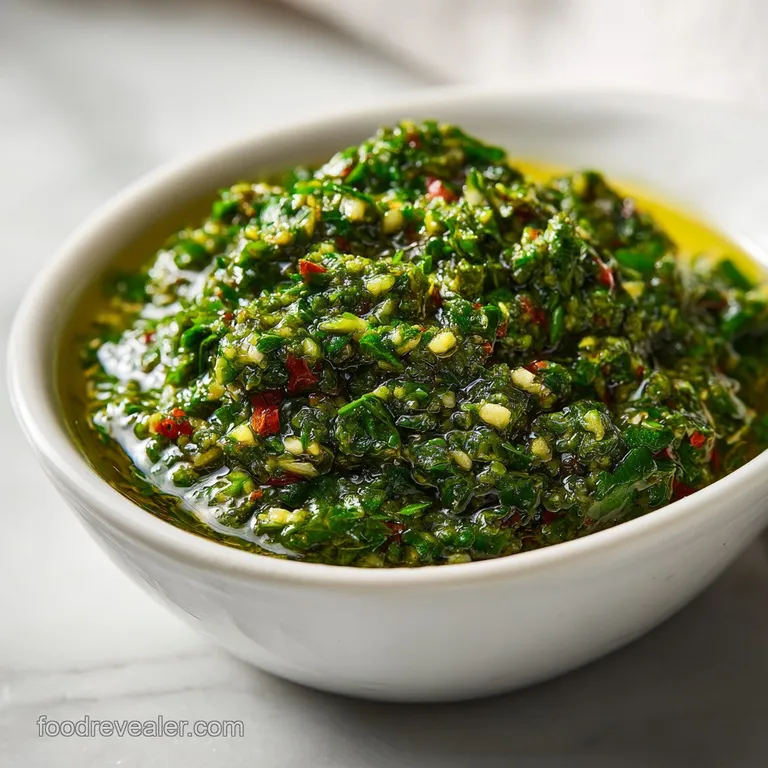
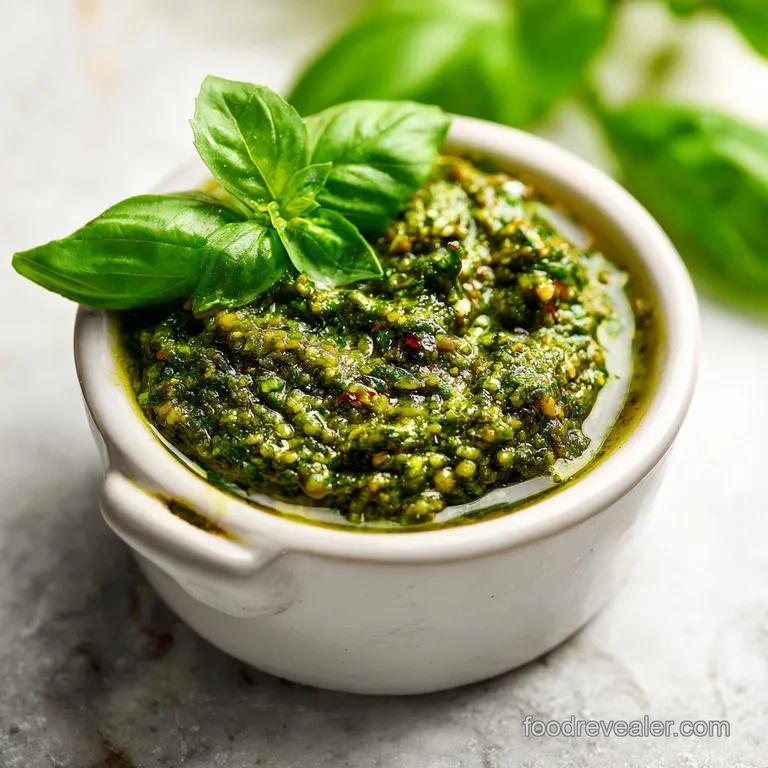
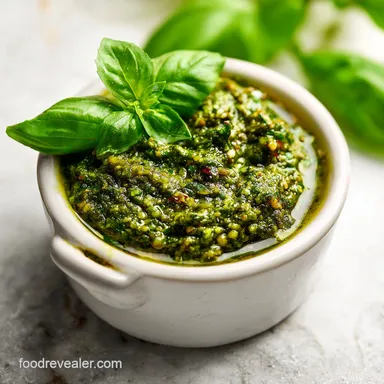
Vibrant Basil Pesto: Fresh and Velvety
- Time: Active 10 minutes, Passive 2 minutes, Total 12 minutes
- Flavor/Texture Hook: Vibrant, herbaceous, and velvety with a nutty crunch.
- Perfect for: Quick weeknight pasta, elevating grilled proteins, or meal prep.
- Achieve Vibrant Color With This Basil Pesto Recipe
- Understanding Thermal Impact on Herbal Flavors
- Choosing High Quality Ingredients for Maximum Impact
- Necessary Tools for a Velvety Finish
- Executing the Steps for Success
- Correcting Common Texture and Color Issues
- Innovative Variations for Every Dietary Need
- Long Term Storage and Freezing Solutions
- Flavor Pairings to Enhance Your Meals
- Recipe FAQs
- 📝 Recipe Card
Achieve Vibrant Color With This Basil Pesto Recipe
Forget everything you have been told about the mandatory marble mortar and pestle. While I respect the tradition, most of us don't have twenty minutes to spend pounding leaves into a pulp on a Tuesday night.
The myth that a food processor "kills" the flavor is only half true; it is not the blades that ruin the sauce, it is the heat they generate. If you have ever wondered why your homemade sauce turns a sad, oxidized brown within ten minutes of hitting the bowl, it is because the friction of the blades literally cooked the delicate basil.
I used to struggle with that muddy color until I realized that pesto is less about cooking and more about temperature management. When you treat your herbs like a delicate chilled salad rather than a hot sauce, the results change instantly.
This basil pesto recipe is designed to bypass the common pitfalls of bitterness and browning by using a few simple cooling tricks that keep the flavor bright and the color neon green.
We are going to focus on layering the flavors correctly. Instead of just throwing everything into a blender and hoping for the best, we will build a foundation of toasted nuts and pungent garlic, followed by a gentle emulsification of oil and herbs.
This approach ensures every bite has that sharp, salty kick of aged cheese balanced by the peppery sweetness of fresh basil.
Understanding Thermal Impact on Herbal Flavors
Managing the physical state of your ingredients is what separates a gritty, dull sauce from a smooth, professional one. Pesto is a raw sauce, meaning we rely entirely on the volatile oils trapped inside the leaves and nuts.
- Thermal Shielding: Chilling the processor bowl and blades prevents the metal from transferring friction heat to the basil, which stops the oxidation process before it starts.
- Oil Emulsification: Adding the extra virgin olive oil in a slow, steady stream while pulsing creates a stable suspension of fat and water, resulting in a velvety mouthfeel.
- Maillard Enhancement: Toasting the pine nuts for exactly 2 minutes triggers the release of essential oils that provide a deeper, more savory backbone to the sauce.
- Enzymatic Deactivation: A tiny splash of lemon juice acts as an antioxidant, helping the basil maintain its chlorophyll structure even when exposed to air.
| Servings | Ingredient Adjustments | Pan Size | Prep Time |
|---|---|---|---|
| 6 people | 1 cup Basil, 1/4 cup Oil | Small Skillet | 5 minutes |
| 12 people | 2 cups Basil, 1/2 cup Oil | Medium Skillet | 10 minutes |
| 24 people | 4 cups Basil, 1 cup Oil | Large Skillet | 15 minutes |
The table above helps you scale this recipe depending on whether you are meal prepping for the week or hosting a large Italian themed dinner. For the best results, I always recommend making at least the 12 serving batch, as smaller amounts can sometimes get lost under the blades of a standard sized food processor.
If you are looking for a way to use this sauce immediately, it works beautifully as a spread. I often use it as a base for a Pesto Grilled Cheese when I want something more substantial than just pasta.
Choosing high-quality Ingredients for Maximum Impact
Since we aren't cooking these ingredients, their individual quality is exposed. There is nowhere for mediocre oil or stale nuts to hide. I always tell my friends to treat this like a shopping trip for a cheese board; pick the stuff you actually want to eat on its own.
| Ingredient | Science Role | Pro Secret |
|---|---|---|
| Fresh Basil | Primary Aromatic | Use only the leaves; stems add a bitter, "grassy" note that ruins the silkiness. |
| Pine Nuts | Fat and Texture | Toast them until they are just golden to unlock a buttery, toasted marshmallow aroma. |
| Extra Virgin Olive Oil | Emulsifier | Choose a "buttery" or "mild" oil; peppery oils can make the final sauce too harsh. |
- 2 cups (approx. 60g) Fresh Basil Leaves, packed: Look for Genovese basil if possible. The leaves should be supple and deep green without any black spotting. Why this? Genovese basil has a higher concentration of essential oils and less minty undertones.
- 1/3 cup (50g) Pine Nuts: These provide the classic creamy texture. Why this? They contain high levels of pinolenic acid which adds a unique, silky mouthfeel.
- 3 cloves Garlic, peeled and smashed: Smashing the garlic first helps it blend more evenly. Why this? Fresh garlic provides a sharp contrast to the rich fats of the nuts and oil.
- 1/2 cup (120ml) Extra Virgin Olive Oil: This is the vehicle for all the flavor. Why this? Cold pressed oil preserves the fruity notes that complement the basil.
- 1 tbsp Fresh Lemon Juice: Just enough to provide a bright lift. Why this? The acidity cuts through the heavy fat and prevents the green color from fading.
- 1/2 cup (50g) Parmigiano Reggiano, freshly grated: This provides the salt and umami. Why this? Aged cheese adds a crystalline texture and deep nutty flavor.
- 2 tbsp (20g) Pecorino Romano, freshly grated: A sharper, sheep’s milk cheese for balance. Why this? It adds a tangy "funk" that makes the sauce more complex.
- 1/2 tsp Sea Salt: To enhance the natural flavors. Why this? Fine sea salt dissolves quickly into the sauce without leaving a grit.
- 1/4 tsp Freshly cracked Black Pepper: For a subtle, warming heat. Why this? Freshly cracked pepper has more floral notes than pre ground varieties.
Necessary Tools for a Velvety Finish
While I’ve mentioned that the food processor is my go to, the specific tools you use will dictate the final texture. If you want a chunky, rustic sauce, a small chopper works fine. But for that "velvety" finish that clings to every strand of pasta, you need something with a bit more power and precision.
A standard food processor with a sharp "S" blade is the gold standard here. The wide base allows the basil to move freely without getting stuck in the corners, which is often a problem with tall, narrow blenders.
If you do use a blender, you will likely need to add more oil to keep things moving, which can dilute the flavor.
I also recommend having a small, heavy bottomed stainless steel skillet for the pine nuts. They go from "fragrant" to "burnt" in about five seconds, so a pan with even heat distribution is your best friend. Finally, a microplane or fine grater for the cheese is non negotiable.
Pre grated cheese is often coated in potato starch to prevent clumping, which will turn your sauce grainy.
Chef's Tip: Freeze your food processor blade for 10 minutes before you start. It sounds like overkill, but it’s the most effective way to keep the basil from oxidizing due to blade friction.
Executing the Steps for Success
- Chilling and Toasting: Place your food processor bowl and blade in the refrigerator or freezer for 10 minutes. Note: This prevents heat induced oxidation. While that chills, put the 1/3 cup pine nuts in a dry skillet over medium low heat. Cook for 2 minutes until fragrant and golden brown, shaking the pan constantly. Transfer them to a plate immediately to stop the cooking.
- Creating the Base: Place the cooled pine nuts, 3 smashed garlic cloves, and 1 tbsp lemon juice into the chilled food processor. Pulse 5 7 times until a coarse, sandy paste forms.
- Adding the Herbs: Add the 2 cups of fresh basil leaves to the bowl. You don't need to chop them; the machine will handle it.
- Emulsifying the Oil: While pulsing in short, 1 second bursts, slowly drizzle in the 1/2 cup olive oil through the feed tube. Continue until the basil is finely chopped but not a smooth puree.
- Adding the Cheese: Open the lid and add 1/2 cup Parmigiano Reggiano and 2 tbsp Pecorino Romano.
- Final Seasoning: Sprinkle in the 1/2 tsp sea salt and 1/4 tsp black pepper.
- The Gentle Finish: Pulse only 2 or 3 times to incorporate the cheese. Stop when the texture is thick and slightly rustic. Avoid over processing at this stage or the cheese will turn the sauce into a gummy paste.
- The Taste Test: Take a small piece of bread or a spoon and taste. If it feels too sharp, add a tiny bit more oil. If it’s flat, a tiny pinch more salt will wake it up.
Correcting Common Texture and Color Issues
Sometimes things don't go according to plan, even with the best ingredients. The most common heartbreak in the kitchen is watching your beautiful sauce turn brown before it even hits the table. Usually, this is a result of air exposure or heat.
Resolving Unintended Bitter Flavors
If your sauce tastes bitter, it is often because of the olive oil. high-quality extra virgin olive oil contains polyphenols that can break down and taste bitter if they are whipped at high speeds for too long.
If this happens, you can't really remove the bitterness, but you can balance it by adding a tiny bit more cheese or a very small pinch of sugar to trick the palate.
Managing Excessively Thin Consistency
If your sauce is too runny, you likely added too much oil or didn't use enough cheese. The cheese acts as a binder that gives the sauce its "body." You can fix this by pulsing in an extra tablespoon of grated Parmigiano Reggiano.
Alternatively, you can add a few more toasted nuts, but be careful not to make the flavor too heavy.
| Problem | Root Cause | Solution |
|---|---|---|
| Brown Color | Oxidation/Heat | Blanch basil for 5 seconds or keep equipment chilled. |
| Gritty Texture | Poor Cheese Quality | Use freshly grated cheese from a block; avoid pre shredded. |
| Overly Garlicky | Raw Garlic Strength | Blanch garlic cloves in boiling water for 1 minute first. |
Common Mistakes Checklist
- ✓ Never wash basil and leave it damp; water makes the pesto watery and speeds up decay.
- ✓ Don't walk away from the pine nuts while toasting; they burn in an instant.
- ✓ Avoid the "On" button; always use "Pulse" to maintain a rustic texture.
- ✓ Grate your cheese immediately before using to keep the fats fresh.
- ✓ Always let the pine nuts cool completely before adding basil; heat is the enemy.
Innovative Variations for Every Dietary Need
While the classic version is iconic, there are plenty of reasons to swap things out. Maybe you have a nut allergy, or maybe you're trying to save a few dollars pine nuts have become incredibly expensive lately.
If you are looking for a dairy-free or vegan basil pesto recipe no cheese, simply omit the Parmigiano and Pecorino. To keep that savory depth, I replace the cheese with 2 tablespoons of nutritional yeast and an extra 1/4 teaspoon of salt.
The yeast provides a similar "funky" umami flavor that mimics the aged cheese quite well.
For those needing a nut free basil pesto recipe, toasted sunflower seeds or pumpkin seeds (pepitas) are brilliant substitutes. They provide a similar crunch and fat content without the allergen risk.
If you want to get creative with flavor pairings, try adding a teaspoon of white miso paste to the blend. It's a modern Asian fusion twist that adds a layer of fermented saltiness that is absolutely addictive.
| Original Ingredient | Substitute | Why It Works |
|---|---|---|
| Pine Nuts | Walnuts | High fat content. Note: Slightly more bitter; peel skins if possible. |
| Parmigiano Reggiano | Nutritional Yeast | Adds umami. Note: Makes the recipe vegan and dairy-free. |
| Basil | Baby Spinach | Mild flavor. Note: Stays green longer but lacks peppery bite. |
If you have leftovers and want something different for lunch, try a creamy basil pesto pasta salad. Just whisk two tablespoons of your finished pesto with a dollop of Greek yogurt or mayo. It creates a silky dressing that coats cold pasta perfectly without clumping.
Long Term Storage and Freezing Solutions
Storing pesto is an art form because oxygen is the enemy. If you just put it in a Tupperware container, the top layer will turn black by the next morning. It’s still safe to eat, but it looks unappealing.
To prevent this, place your pesto in a jar and press it down with a spoon to remove air pockets. Pour a thin layer of olive oil over the top about an eighth of an inch to create a physical seal against the air. It will stay fresh in the fridge for up to 5 days this way.
For a basil pesto recipe for freezing, the "ice cube tray method" is the only way to go. Spoon the sauce into the trays and freeze until solid. Once they are frozen "pesto pucks," transfer them to a freezer safe bag.
This allows you to grab exactly one or two servings whenever you need to lift a boring soup or pasta dish. They will keep their flavor for about 3 months.
When it comes to the "zero waste" side of things, don't throw away those basil stems! While they are too bitter for the sauce, they are packed with flavor. Throw them into a bag in your freezer and add them to your next batch of vegetable or chicken stock. They add a lovely herbaceous note that usually goes to waste.
Flavor Pairings to Enhance Your Meals
The most common way to serve this is with pasta, specifically Trofie or Linguine. In Liguria, where this dish originated, they often boil a few pieces of potato and some green beans in the same water as the pasta. The starch from the potatoes helps the sauce cling to the noodles, creating a much more cohesive dish.
But don't stop at pasta. This sauce is a powerhouse for "lifting" simpler meals. I love using it as a marinade for Crispy Fried Catfish — the herbs cut right through the richness of the fried fish. It also makes a fantastic base for a modern Caprese toast. Take a thick slice of sourdough, toast it until the edges are dark, smear a thick layer of pesto, and top with fresh burrata and heirloom tomatoes.
If you want a quick appetizer for guests, a Classic Bruschetta topped with a small dollop of this sauce adds a professional touch that looks much harder than it actually is. The key is to add the pesto at the very last second so the heat of the toast doesn't dull the color.
This recipe is really just a starting point. Once you understand the balance of fat, salt, and temperature, you can start swapping in different herbs like cilantro or parsley, or even adding a bit of chili flakes for a spicy kick. The logic remains the same: keep it cold, keep it fresh, and don't over process.
Now, go grab that basil and get pulsing!

Recipe FAQs
What are the ingredients in basil pesto?
This recipe combines fresh basil leaves, pine nuts, garlic, and high-quality extra virgin olive oil. It also features a blend of freshly grated Parmigiano Reggiano and Pecorino Romano, seasoned with lemon juice, sea salt, and cracked black pepper.
What are common pesto making mistakes?
The most frequent errors include leaving the basil damp after washing, burning the pine nuts, and using the continuous "On" button instead of pulsing. Using warm ingredients or pre-grated cheese can also ruin the vibrant color and emulsion quality.
Is pesto good for people with CKD?
No, individuals with chronic kidney disease should generally avoid this recipe. The high phosphorus and sodium content found in hard cheeses like Parmigiano Reggiano and Pecorino make it unsuitable for most renal friendly diets.
What is the secret ingredient in basil pesto?
Chilling your food processor bowl and blade for 10 minutes is the real secret. This technique prevents heat induced oxidation, keeping the basil bright green. If you enjoyed Casserole for 6 Servings recipe, you will find it equally effective when working with chilled ingredients in other complex recipes.
How to keep basil pesto from turning brown?
Process the basil in short, controlled pulses and ensure all nuts are completely cool before starting. Exposure to heat and oxygen triggers enzymatic browning, so keep your equipment cold and serve immediately to maintain the best color.
How to achieve the perfect rustic texture?
Pulse the mixture in short bursts rather than running the processor continuously. By pulsing just 5 7 times for the base and only 2 or 3 times for the cheese, you ensure the pesto remains thick and textured rather than becoming a thin, over processed puree.
Is it true I must toast the pine nuts for flavor?
Yes, toasting the pine nuts over medium low heat is essential for developing the deep, nutty profile required for a balanced pesto. Watch them closely and shake the pan constantly, as they can transition from golden brown to burnt in just a few seconds.
Homemade Basil Pesto Recipe
Ingredients:
Instructions:
Nutrition Facts:
| Calories | 134 kcal |
|---|---|
| Protein | 2.4 g |
| Fat | 13.7 g |
| Carbs | 1.2 g |
| Fiber | 0.3 g |
| Sugar | 0.1 g |
| Sodium | 193 mg |
