Traditional Banana Bread Recipe: Velvety and Caramelized
- Time:20 minutes active + 60 minutes baking = Total 80 minutes
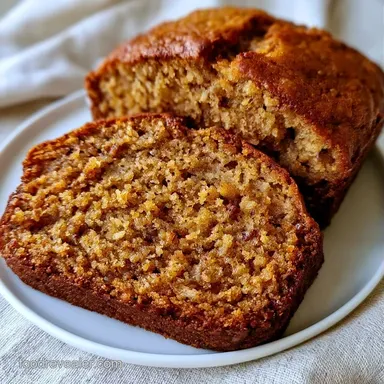
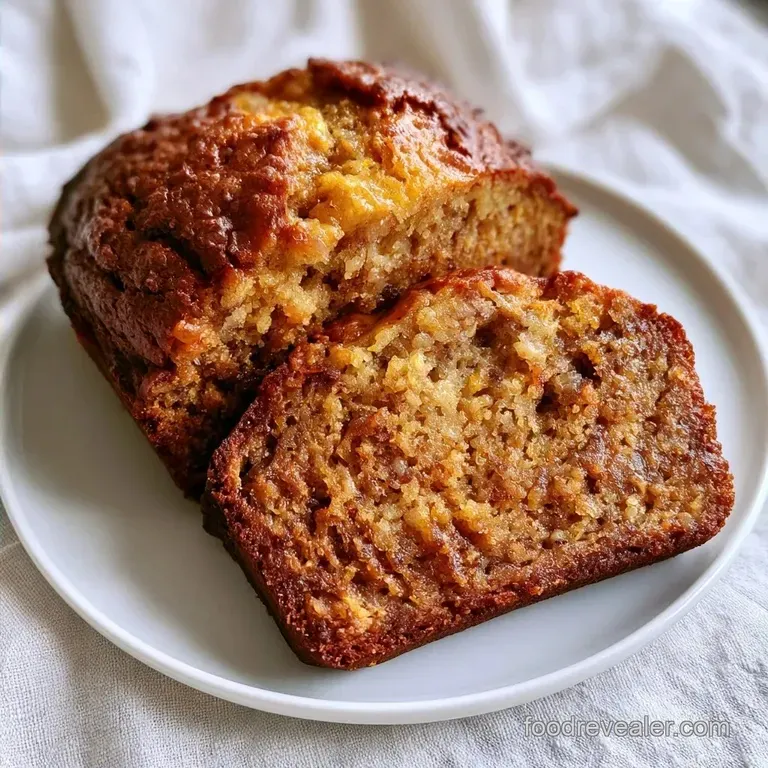
- Flavor/Texture Hook: Velvety crumb with a caramelized, aromatic crust
- Perfect for: Slow Sunday mornings, using up old fruit, or a budget-friendly treat
- Traditional Banana Bread Recipe
- The Appeal of This Loaf
- Core Ingredient Analysis
- Essential Ingredients List
- Step-by-Step Baking Guide
- Fixing Common Baking Issues
- Troubleshooting Common Issues
- Adjusting the Batch Size
- Banishing Baking Myths
- Storage and Waste Tips
- Best Ways to Serve
- Recipe FAQs
- 📝 Recipe Card
That smell of caramelized sugar and warm cinnamon hitting you the second you open the oven door is honestly the best part of the weekend. For me, it all starts with the "banana graveyard" on my kitchen counter.
You know the one, where you keep meaning to make a smoothie but then you get distracted, and suddenly those bright yellow bananas have turned a mottled, suspicious shade of black.
I used to think those bananas were gone, but they're actually at their peak. When they get that dark, the starches have fully turned to sugar, making them a concentrated syrup. This is the secret to a Traditional Banana Bread Recipe that actually tastes like something from a cozy bakery and not a dry sponge.
You can expect a loaf that is heavy, moist, and has those gorgeous, dark edges where the sugar has slightly charred. It's a simple process, but there are a few spots where it's easy to mess up, like over mixing the batter. We'll avoid that so you get a tender slice every time.
Traditional Banana Bread Recipe
The magic of this loaf isn't in any fancy equipment or rare ingredients, but in the patience of letting your fruit get "too old." When you use brown sugar instead of white, you add a hint of molasses that pairs perfectly with the fruity notes. It transforms a basic snack into something that feels like a proper treat.
I've found that the biggest mistake people make is trying to rush the mashing process. If you use a blender, you lose the texture. I prefer a fork and a bit of elbow grease, leaving just a few small chunks of banana.
Those little pockets of fruit create "moisture bombs" throughout the loaf that keep it from drying out, even a few days later.
Since we're keeping this budget smart, we're using pantry staples. No expensive almond flours or weird additives here. Just a few basics handled with a bit of care. It's the kind of baking that clears out your fridge and fills your house with a scent that makes everyone wander into the kitchen.
The Appeal of This Loaf
The reason this works better than a quick mix version is all about the moisture distribution. Most recipes just call for "bananas," but the ratio here is designed to keep the bread from becoming a cake. We want it dense but soft, with a crumb that holds up to a thick slab of salted butter.
Natural Sweetness: Using overripe bananas reduces the need for excessive refined sugar, letting the fruit's own sugars do the heavy lifting.
The Butter Bond: Melted butter creates a more uniform crumb than creamed butter, which is why this feels like "bread" rather than a "cake."
Tender Crumbs: The combination of baking soda and the acidity in brown sugar creates a lift that doesn't make the bread too airy or fluffy.
Caramelized Crust: The brown sugar reacts with the oven heat to create a dark, sticky exterior that contrasts with the soft middle.
| Method | Time | Texture | Best For |
|---|---|---|---|
| Fast Mix | 40 mins | Lighter, cake like | Quick snacks |
| Classic | 80 mins | Dense, velvety | Traditional taste |
Core Ingredient Analysis
The interaction between the wet and dry ingredients is what prevents the loaf from collapsing in the middle. When the baking soda hits the mashed fruit and brown sugar, it creates those tiny bubbles that keep the bread from being a brick.
| Ingredient | Science Role | Pro Secret |
|---|---|---|
| Overripe Bananas | Moisture & Flavor | The blacker the peel, the sweeter the bread |
| Brown Sugar | Tenderness & Color | Adds molasses for a deeper, caramel taste |
| Baking Soda | Lifting Agent | Reacts with banana acidity to create rise |
| Melted Butter | Fat & Mouthfeel | Slightly cooled butter prevents eggs from scrambling |
Essential Ingredients List
Here is everything you need. Keep it simple, and don't worry if your bananas are a bit too mushy, that's actually what we want.
- 1/2 cup (115g) unsalted butter, melted and slightly cooled Why this? Provides a rich base and velvety texture
- 3/4 cup (150g) brown sugar, packed Why this? Adds moisture and a caramel like depth
- 2 large eggs, room temperature Why this? Binds the ingredients for a sturdy structure
- 1 tsp (5ml) vanilla extract Why this? Rounds out the sweetness of the fruit
- 1 1/2 cups (340g) mashed overripe bananas Why this? The primary source of flavor and moisture
- 1 1/2 cups (190g) all purpose flour Why this? Standard structure; creates a reliable crumb
- 1 tsp (5g) baking soda Why this? Essential for the rise in a heavy batter
- 1/2 tsp (3g) salt Why this? Balances the sugar and enhances cinnamon
- 1 tsp (2g) ground cinnamon Why this? Adds warmth and a classic aromatic profile
Smart Substitutions
| Original Ingredient | Substitute | Why It Works |
|---|---|---|
| All Purpose Flour | White Whole Wheat Flour | Adds nuttiness. Note: Crumb will be denser and heartier |
| Brown Sugar | Coconut Sugar | Similar caramel notes. Note: Slightly less moisture than brown sugar |
| Unsalted Butter | Coconut Oil (melted) | Similar fat content. Note: Adds a subtle coconut flavor |
| Eggs | Flax Eggs (2 tbsp meal + 6 tbsp water) | Plant based binder. Note: Heavier texture, less rise |
If you find yourself with extra bananas but not enough time for a full loaf, you can always pivot. I often make homemade banana pancakes on weekday mornings when I need something faster than an 80 minute bake.
Step-by-step Baking Guide
Right then, let's get into the actual making. Follow these steps closely, especially the part about not over mixing. That's where most people go wrong.
- Preheat your oven to 350°F (175°C) and grease a 9x5 inch loaf pan. Note: Use butter or oil to prevent sticking
- In a large bowl, mash the bananas until smooth but slightly chunky. Check: You want a few small lumps for texture.
- Stir in the melted butter, brown sugar, eggs, and vanilla. Mix until the batter is a uniform, creamy gold.
- Sift the flour, baking soda, salt, and cinnamon directly into the wet mixture. Note: Sifting prevents soda clumps
- Using a rubber spatula, gently fold the ingredients together. Stop the moment no white streaks of flour remain to prevent overworking the batter.
- Pour the batter into the prepared pan and bake for 50-60 minutes.
- Test for doneness by inserting a toothpick into the center; it should come out with a few moist crumbs, but no raw batter.
- Let the loaf cool in the pan for 10 minutes before moving it to a wire rack. Cue: The edges should pull away slightly from the pan.
Chef's Note: If the top is browning too quickly but the center is still raw, loosely tent a piece of foil over the pan for the last 15 minutes. This protects the crust while the middle finishes.
Fixing Common Baking Issues

Baking a Traditional Banana Bread Recipe can be tricky because moisture levels in bananas vary. One batch might be a bit wetter than the next, which can lead to a few common hiccups.
Troubleshooting Common Issues
| Issue | Solution |
|---|---|
| Why Your Loaf Is Too Dense | If your bread feels like a brick, you likely over mixed the flour. When you stir too much, you develop gluten, which is great for sourdough but terrible for a quick bread. |
| Why Your Loaf Sinks in Middle | A sunken center usually happens when the oven door is opened too early or the baking soda is expired. The sudden drop in temperature causes the air bubbles to collapse before the structure has set. |
| Why Your Edges Are Burnt | This is often a result of using a dark colored metal pan, which absorbs more heat. Alternatively, your oven might be running hot. Try moving the rack one level down. |
Common Mistakes Checklist
- ✓ Avoided using a whisk for the flour (used a spatula instead)
- ✓ Bananas were truly overripe (dark brown/black)
- ✓ Eggs were at room temperature before mixing
- ✓ Toothpick was checked in the absolute center
- ✓ Loaf rested in the pan before being flipped
Adjusting the Batch Size
Sometimes you don't need a whole giant loaf, or maybe you're feeding a crowd. Adjusting this Traditional Banana Bread Recipe is straightforward, but you have to be careful with the leavening.
Scaling Down (Half Batch) Use a smaller 8x4 inch pan. You'll need to beat one egg in a small bowl and use only half of it (about 2 tablespoons). Reduce the baking time by about 20%, but start checking at 40 minutes.
Scaling Up (Double Batch) I recommend baking two separate loaves rather than one giant one. If you try to double the batter in one pan, the outside will burn before the middle ever cooks. Keep the salt and cinnamon at 1.5x instead of 2x to avoid an overpowering flavor.
Baking Adjustments If you're making mini loaves in a muffin tin, the temperature stays at 350°F, but the time drops significantly to about 20-25 minutes. Watch for that golden brown top and a springy center.
| Goal | Action | Result |
|---|---|---|
| Mini Loaves | Use muffin tin | 22 min bake time |
| Extra Moist | Add 1 tbsp sour cream | Heavier, silkier crumb |
| Nutty Texture | Fold in 1/2 cup walnuts | Added crunch and saltiness |
Banishing Baking Myths
There are a lot of "rules" about banana bread that just aren't true. Let's clear a few of them up so you can bake with confidence.
Myth: Black bananas are rotten. Truth: They aren't rotten, they're just extremely ripe. The peel turns black as the starch converts to sugar. This is actually the goal for a Traditional Banana Bread Recipe because it provides the most flavor.
Myth: You must cream butter and sugar together. Truth: While creaming is great for cakes, melting the butter for this bread creates a denser, more traditional "loaf" feel. It also makes the process much faster and more budget friendly since you don't need a stand mixer.
Myth: Using a blender for bananas is better. Truth: A blender makes the batter too uniform and thin. Mashing by hand leaves those small fruit pieces that create moisture pockets, which prevents the bread from drying out.
Storage and Waste Tips
To keep your loaf from going stale, storage is key. Because of the high moisture content from the bananas, this bread can actually get too moist if stored improperly, leading to mold.
Storage Guidelines Keep the loaf at room temperature in an airtight container for up to 3 days. For longer storage, slice the bread first and freeze the slices individually with parchment paper in between. They'll stay fresh for up to 3 months in the freezer.
Reheating For a slice that tastes fresh from the oven, pop it in a toaster oven for 2-3 minutes. This recrisps the edges and melts the sugars again. Avoid the microwave if you can, as it can make the bread feel spongy.
Zero Waste Tips If you have a few slices left that have gone a bit dry, don't toss them. Cube them and toast them in a pan with a bit of butter to make "banana bread croutons" for yogurt. Also, save your banana peels if you garden, as they make a fantastic potassium rich compost for roses.
Best Ways to Serve
While a plain slice is great, there are a few ways to make this feel more like a decadent dessert. I love serving it warm with a thick smear of salted butter or a drizzle of honey.
For a real treat, try slicing the bread and searing it in a pan with butter until the edges are crispy. It's a great pairing with a cup of strong coffee or tea. If you're looking for another cozy bread to add to your rotation, my Butter Sourdough for 4 recipe is a fantastic option for those who enjoy a more fermented, tangy flavor.
You can also serve this as part of a brunch spread. Pair a slice of Traditional Banana Bread Recipe with some fresh berries and a dollop of Greek yogurt for a balanced meal. It's simple, honest food that doesn't need much help to shine.
Trust me on this, the simpler you keep the toppings, the more the banana flavor stands out.
Recipe FAQs
How do you make banana bread?
Mash bananas, stir in wet ingredients, and fold in sifted dry ingredients. Bake the batter in a greased 9x5 inch pan at 350°F for 50 60 minutes.
Does brown sugar make banana bread moist?
Yes, it does. The molasses in brown sugar attracts and retains more moisture than granulated sugar, resulting in a more tender crumb.
Is it true that stirring the batter longer makes the loaf fluffier?
No, this is a common misconception. Overmixing develops too much gluten, which transforms a light quick bread into a dense, brick like loaf.
How do you make banana bread quickly?
Prepare the batter in 20 minutes by mashing bananas and folding in ingredients before baking for 50 60 minutes. If you enjoy the efficiency of this prep, see how we achieve similar fast results in our basil pesto.
How do you know when the loaf is finished baking?
Insert a toothpick into the center of the loaf. It is ready when the toothpick comes out with a few moist crumbs but no raw batter.
How should banana bread be stored to prevent mold?
Store in an airtight container at room temperature for up to 3 days. For longer preservation, freeze individual slices separated by parchment paper for up to 3 months.
Why does the middle of the banana bread sink?
Avoid opening the oven door too early. A sudden drop in internal temperature causes air bubbles to collapse before the structure has fully set.
Traditional Banana Bread Recipe