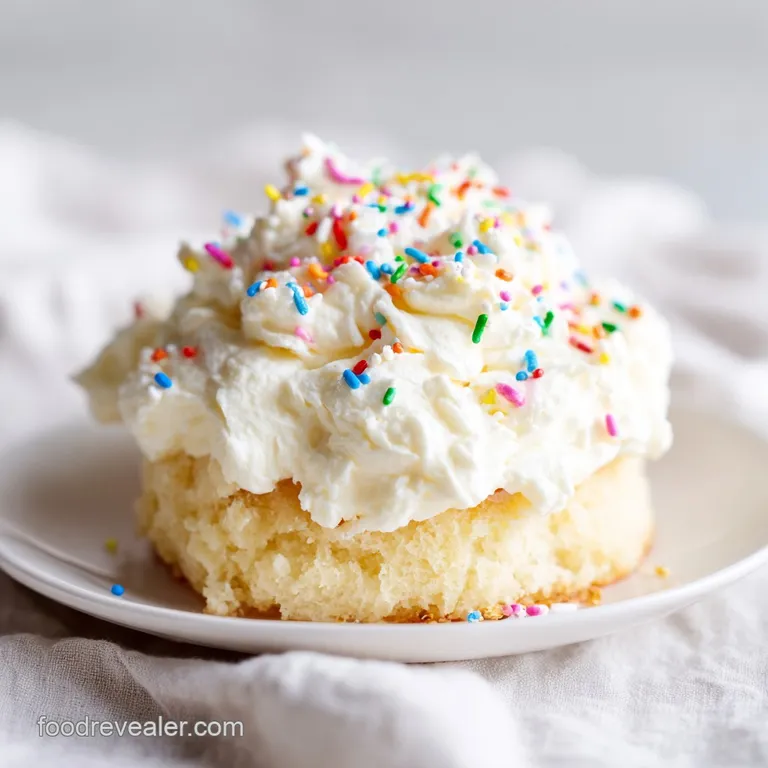
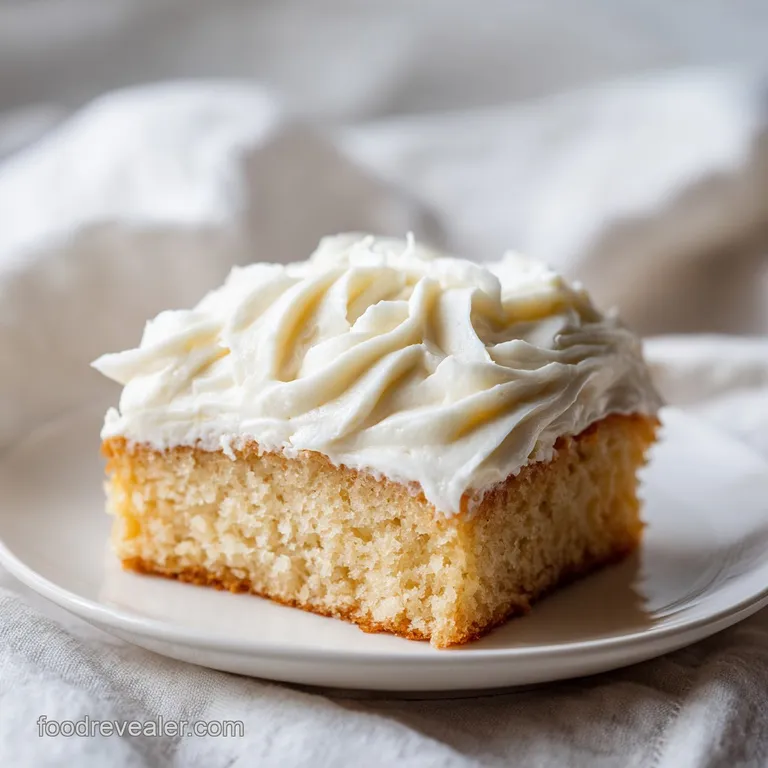
Vanilla Buttercream Frosting: Fluffy and Silky
- Time: Active 15 minutes, Passive 0 minutes, Total 15 minutes
- Flavor/Texture Hook: Silky, whipped, and velvety with a deep vanilla finish
- Perfect for: Birthday cakes, detailed piping, or filling sandwich cookies
- Crafting The Best Vanilla Buttercream Frosting
- Why This Whipped Frosting Works
- Component Analysis for Perfect Results
- Essential Items for Your Cupboards
- Step-by-Step Preparation Guide
- Troubleshooting Common Frosting Issues
- Scaling for Different Batch Sizes
- Debunking Common Frosting Myths
- Storage and Zero Waste Tips
- Creative Pairing Suggestions
- Recipe FAQs
- 📝 Recipe Card
Crafting The Best Vanilla Buttercream Frosting
Have you ever noticed how professional bakery frosting looks almost white, while the stuff we make at home often ends up looking like pale yellow candle wax? It’s a tiny detail, but it’s the hallmark of a truly whipped American buttercream.
The secret isn't some expensive whitening agent or a hidden chemical; it's simply the sound of your mixer working overtime. When you hear that steady, rhythmic thwack of the paddle hitting the sides of the bowl for five full minutes, you’re actually witnessing a physical transformation of the fat molecules.
I remember my first real success with this. I was making a cake for a friend's wedding and I was terrified the frosting would melt or taste like a stick of margarine. I decided to stop worrying about "over mixing" and just let the stand mixer run.
The aroma of high-quality vanilla hitting that aerated butter was a revelation. It went from heavy and greasy to something that looked like a whipped marshmallow. That was the day I realized most people stop mixing far too early.
This recipe is designed to give you that high end bakery finish without a massive grocery bill. We’re using basic pantry staples, but we're treating them with the respect they deserve.
By the time you’re done, you’ll have a bowl of velvety frosting that pipes like a dream and doesn't leave that cloying, grainy film on the roof of your mouth. It’s all about the timing and the temperature, and I’m going to show you exactly how to hit those marks every single time.
Why This Whipped Frosting Works
- Mechanical Aeration: Beating the butter for five minutes incorporates tiny air bubbles, which lightens the color and creates a fluffy, voluminous texture.
- Sugar Suspension: Sifting the confectioners' sugar ensures that the fine particles distribute evenly within the fat, preventing any unpleasant grittiness.
- Fat Stabilization: Using cool room temperature butter (about 18°C) allows the fat to hold air without collapsing or becoming too oily.
- Salt Balance: A tiny amount of fine sea salt cuts through the intense sweetness of the sugar, making the vanilla flavor feel more prominent.
| Preparation Method | Total Time | Texture Result | Best For |
|---|---|---|---|
| Full Whipped Method | 15 minutes | Silky and cloud like | Decorative piping and layer cakes |
| The Quick Mix | 5 minutes | Dense and heavy | Simple sheet cakes or brownies |
| Hand Whisked | 20 minutes | Soft and rustic | Small batches of cookies |
Choosing the right method depends on how much time you have, but for a true Vanilla Buttercream Frosting, the full whipped method is unbeatable. It provides the structural integrity needed for tall cakes while keeping the mouthfeel light.
If you're in a rush, the quick mix works, but you'll lose that signature ivory color and airy lift that makes this recipe special.
Component Analysis for Perfect Results
| Ingredient | Science Role | Pro Secret |
|---|---|---|
| Unsalted Butter | Provides the structural fat base and mouthfeel. | Use "cool room temp" (18°C) so it's pliable but not greasy. |
| Confectioners' Sugar | Acts as the sweetener and the primary thickening agent. | Sift twice to remove stubborn clumps that ruin piping tips. |
| Heavy Whipping Cream | Emulsifies the fat and sugar for a silky finish. | Add it last to adjust the final spreadability perfectly. |
| Pure Vanilla Extract | Delivers the primary aromatic and flavor profile. | Use clear vanilla if you want a stark, "wedding white" look. |
When you're building a dessert, the frosting is often the most criticized part. If it's too sweet, it overpowers the cake. If it's too heavy, it's hard to eat. That’s why the heavy whipping cream is so important here.
Unlike milk, which is mostly water, the cream adds more fat, which helps keep the emulsion stable and prevents the sugar from weeping over time.
Essential Items for Your Cupboards
- 1 cup (226g) Unsalted butter: Softened to cool room temperature. Why this? Allows for maximum air incorporation without melting the fat structure.
- Substitute: Salted butter (omit the extra salt) or high-quality vegan butter sticks.
- 0.5g fine sea salt: Just a pinch. Why this? Chemically suppresses bitterness and enhances the floral notes of vanilla.
- Substitute: Table salt (use slightly less as it’s denser).
- 4 cups (500g) Confectioners' sugar: Sifted. Why this? Provides the volume and structure without any grainy texture.
- Substitute: Homemade powdered sugar (blended granulated sugar with 1 tsp cornstarch).
- 3 tbsp (45ml) Heavy whipping cream: Chilled or room temp. Why this? Creates a velvety emulsion that holds up better than milk.
- Substitute: Full fat coconut milk (adds a slight tropical note).
- 1 tbsp (15ml) Pure vanilla extract: The best you can afford. Why this? The high alcohol content carries the flavor through the fat.
- Substitute: Vanilla bean paste for beautiful black speckles throughout.
Chef's Tip: If you only have salted butter on hand, don't sweat it. Just leave out the extra 0.5g of salt. However, unsalted butter is preferred because it gives you total control over the seasoning of your Vanilla Buttercream Frosting.
step-by-step Preparation Guide
- Place the 226g of cool room temperature butter and the 0.5g of salt in the bowl of a stand mixer. Note: Starting with cool butter prevents the frosting from becoming soupy later.
- Beat on medium high speed using the paddle attachment for 5 minutes until the butter turns pale ivory and increases in volume.
- Turn the mixer to the lowest setting to prevent a "sugar cloud" in your kitchen.
- Gradually add the 500g of sifted confectioners' sugar one cup at a time, allowing it to integrate before adding the next.
- Once the sugar is incorporated, stop the mixer and scrape down the sides and bottom of the bowl with a spatula.
- Add the 45ml of heavy whipping cream and the 15ml of vanilla extract.
- Increase the speed to medium and beat for another 2-3 minutes until the frosting reaches a silky, spreadable consistency.
- Check the texture by dragging a spatula through the frosting; it should be smooth with no visible air pockets.
- If you see large air bubbles, beat on the lowest speed for 1 minute to "knock them out" before piping.
- Transfer to a piping bag immediately or cover with plastic wrap pressed against the surface to prevent a crust from forming.
Troubleshooting Common Frosting Issues
Why is my buttercream grainy?
This is almost always due to the sugar not being fine enough or failing to sift it. Even "pre sifted" sugar can clump in the bag. Another culprit is adding the sugar too fast, which prevents the fat from coating each tiny grain.
If it's already grainy, try adding a tiny bit more cream and beating it for an extra three minutes to help dissolve the crystals.
| Problem | Root Cause | Solution |
|---|---|---|
| Soupy/Runny | Butter was too warm or melted. | Chill the bowl for 15 mins, then re whip. |
| Air Bubbles | Beaten on too high a speed at the end. | Stir by hand with a spatula to press out air. |
| Overly Sweet | Not enough salt or acidity. | Add a tiny pinch of salt or 1/4 tsp lemon juice. |
Common Mistakes Checklist
- ✓ Don't use "spreadable" butter from a tub (it has too much water/oil).
- ✓ Ensure your mixing bowl is completely dry before starting.
- ✓ Avoid over softening butter in the microwave; it should dent with a finger but not be shiny.
- ✓ Never skip sifting, even if the sugar looks fine to the naked eye.
- ✓ Use the paddle attachment, not the whisk, to avoid excess air bubbles.
If you are looking for a base to put this frosting on, my Simple Vanilla Cupcakes are the perfect candidate since they share the same flavor profile and provide a sturdy enough base for a tall swirl of buttercream.
Scaling for Different Batch Sizes
When you need to scale this recipe down for a small batch of cookies, you can easily halve it. Use 113g of butter and 250g of sugar. For the egg less nature of this recipe, you don't need to worry about splitting proteins.
Just remember to reduce your whipping time by about 20% since the smaller volume will aerate faster in the bowl.
If you are doubling the recipe for a large multi tier cake, use a 5 quart mixer or larger to ensure you have enough room for the aeration. Keep the salt and vanilla at 1.5x the original amount first, then taste and adjust.
Doubling the sugar can sometimes make the frosting overwhelming, so adding the spices or extracts more conservatively at first is a smart move.
| Batch Size | Butter Amount | Sugar Amount | Ideal Container |
|---|---|---|---|
| Half Batch | 113g | 250g | Small mixing bowl |
| Standard | 226g | 500g | 5 quart stand mixer |
| Double Batch | 452g | 1000g | 6 quart or 7 quart mixer |
Debunking Common Frosting Myths
One common myth is that you must use milk for a "true" American buttercream. In reality, heavy cream is superior because its higher fat content matches the butter, creating a more stable emulsion that won't separate as easily in warm weather.
Milk can sometimes make the frosting feel "thin" or lead to a shorter shelf life.
Another misconception is that you need to use a whisk attachment for fluffy results. Using a paddle attachment on a higher speed actually creates a denser, more stable foam that is much easier to pipe into sharp, clean edges.
Whisk attachments tend to incorporate too much air, leading to those annoying holes and "bubbles" you see in professional cake decorating videos.
Storage and Zero Waste Tips
Fridge Storage: You can store this frosting in an airtight container for up to 1 week. When you're ready to use it, let it sit on the counter for about 2 hours until it reaches room temperature.
You’ll need to give it a quick whip with a spoon or mixer to restore that velvety texture before spreading.
Freezer Storage: This Vanilla Buttercream Frosting freezes beautifully for up to 3 months. I recommend freezing it in a heavy duty freezer bag with all the air squeezed out. Thaw it overnight in the fridge, then follow the room temperature instructions above.
Zero Waste Idea: If you have a small amount of leftover frosting, don't toss it! It makes an incredible filling for homemade "Oreo" style cookies. You can also sandwich it between pieces of my Moist Cornbread recipe for a surprisingly tasty sweet and savory snack, or stir it into your morning coffee for a decadent "bulletproof" style vanilla latte.
Creative Pairing Suggestions
This frosting is the ultimate blank canvas. While it's iconic on a classic yellow cake, try using it as a filling for dark chocolate macarons or as a topping for pumpkin spice muffins. Because the flavor profile is so clean, it highlights the quality of your vanilla.
If you want to get fancy, you can fold in crushed freeze dried raspberries or a tablespoon of espresso powder for a completely different vibe.
For a fun weekend project, I love using this to decorate sugar cookies. If you find the frosting is too soft for intricate designs, just pop it in the fridge for 10 minutes to firm up the butter.
The versatility of a solid Vanilla Buttercream Frosting is really what makes it a staple in any home cook's repertoire. It's the one recipe that, once mastered, opens the door to hundreds of other dessert possibilities.

Recipe FAQs
Why must I beat the butter for 5 minutes before adding sugar?
This step builds the structure of your frosting. Beating the butter on medium high speed for 5 minutes aerates it until it reaches a pale ivory color, which ensures your final buttercream is light, fluffy, and stable.
Is it true I can use melted butter if I am in a hurry?
No, this is a common misconception. You must use cool room temperature butter; melted or warm butter will result in a soupy, greasy mess that cannot hold its shape when piped.
How to avoid a mess when adding confectioners' sugar?
Switch your mixer to the lowest setting before adding the sugar. Adding the sifted sugar one cup at a time and allowing it to fully integrate prevents a giant sugar cloud from coating your kitchen.
How to fix frosting that has been in the fridge for a week?
Let the container sit on your counter for 2 hours to reach room temperature. Once softened, give it a quick whip with a spoon or your mixer to restore that silky, velvety texture before you start decorating.
Can I freeze leftover frosting?
Yes, this frosting freezes beautifully for up to 3 months. Store it in a heavy duty freezer bag with all the air squeezed out, then thaw it overnight in the refrigerator before re-whipping it.
How to ensure the frosting is smooth enough for piping?
Add the heavy whipping cream and vanilla extract after the sugar is fully incorporated. Beating the mixture for an additional 2-3 minutes on medium speed at the end creates a perfectly stable, pipeable consistency.
What is the secret to achieving a professional bakery finish?
The secret lies in the patience you show during the mixing process. If you enjoyed mastering the aeration technique here, see how we apply similar careful Recipe | 50 Min to achieve the perfect crumb.
Vanilla Buttercream Frosting

Ingredients:
Instructions:
Nutrition Facts:
| Calories | 251 calories |
|---|---|
| Protein | 0.2 g |
| Fat | 13.3 g |
| Carbs | 33.1 g |
| Fiber | 0 g |
| Sugar | 32.8 g |
| Sodium | 13.3 mg |
