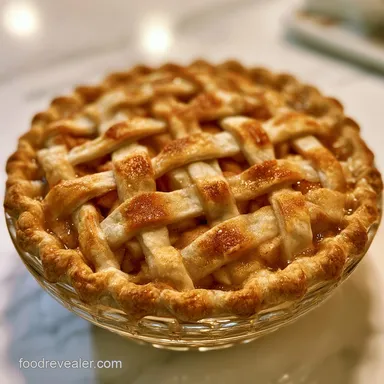
Apple Pie Recipe: from Scratch
- Time:30 minutes active + 60 minutes chilling + 60 minutes baking = Total 150 minutes
- Flavor/Texture Hook: Tart Granny Smith apples contrasted with a buttery, flaky, sugar dusted crust
- Perfect for: Family holiday dinners, autumn gatherings, or when you just need a soul satisfying comfort classic
Ever notice that weird, hollow air pocket in some pies? You know the one, where the crust just sags and there's a mysterious void where the apples should be. It's the most frustrating part of baking, and for a long time, I thought it was just my luck.
I remember one Thanksgiving where I spent hours on a pie, only for it to collapse into a sad, soggy mess the moment I sliced into it.
But here's the secret: the problem isn't your rolling technique, it's the moisture. Apples shrink as they cook, and that's where the gap comes from. By shifting how we handle the fruit, we can turn a risky bake into a reliable win.
This apple pie recipe is all about managing that moisture to get a filling that stays put and a crust that actually shatters when you bite into it.
We're aiming for a beautiful contrast here. I want the bright, sharp tang of Granny Smith apples hitting the rich, salty notes of chilled butter. When you pull this out of the oven, you're looking for a deep golden hue and a scent of toasted cinnamon that fills the whole house.
It's a total comfort classic that satisfies the soul without needing a professional kitchen.
The Best Classic Apple Pie Recipe
Right then, let's get into the nitty gritty. Most people treat pie crust like bread, but it's actually more like a puzzle. If you overwork it, you lose the flakes. If you let the butter melt before it hits the oven, you get a tough, cookie like shell instead of a tender, layered crust.
This apple pie recipe relies on keeping everything ice cold until the very last second.
But the real magic happens in the skillet. Instead of just tossing raw apples into a crust, we're going to sauté them first. This step is non negotiable for me. By cooking the apples with the sugars and spices beforehand, we create a thick, glossy syrup that binds everything together.
It removes the excess water that usually leads to a soggy bottom, making this the most reliable apple pie recipe I've ever used.
I've found that using a mix of apples is the only way to go. Granny Smiths give us that essential structure and tartness, while Honeycrisp apples add a honeyed sweetness and hold their shape. Together, they create a complex flavor profile that doesn't just taste like sugar, but tastes like actual fruit.
Trust me on this, the effort of peeling and slicing two types of apples is worth every second.
Why Most Pies Fail
If you've ever struggled with a pie, it's usually because of a few common physics mishaps. Most recipes tell you to just dump the fruit in and hope for the best, but that's a gamble.
Fresh vs. Shortcut Comparison
| Feature | Fresh Apple Method | Canned/Shortcut Filling | Impact on Result |
|---|---|---|---|
| Texture | Firm, distinct slices | Mushy, uniform paste | Fresh is far superior |
| Sugar Control | Adjusted to taste | Often overly sweet | Fresh is more balanced |
| Moisture | Controlled via sauté | High water content | Shortcut often leads to soggy bottoms |
The biggest culprit is the "steam trap." When raw apples bake, they release a massive amount of steam. If that steam has nowhere to go, it gets trapped between the filling and the bottom crust. This turns your pastry into a wet sponge. By pre cooking the filling, we've already evaporated that excess liquid.
Another common mistake is using room temperature butter. I've seen people try to "soften" the butter for the crust, but that's a disaster. You want those tiny, cold lumps of butter to stay intact.
When they hit the hot oven, those lumps steam and create tiny pockets of air, which is exactly what gives you those gorgeous, flaky layers.
Finally,, don't ignore the cooling period. If you slice a pie the moment it comes out of the oven, the filling is still a liquid. It'll run everywhere, and the crust will lose its crispness.
Giving it at least two hours to set allows the cornstarch to fully gel, turning the filling into a velvety, sliceable masterpiece.
Essential Recipe Specs
Before we start, let's look at the map of flavors we're building. I love thinking about a pie in terms of contrasts.
Flavor Map
- Granny Smith: Sharp, bright, acidic
- Honeycrisp: Mellow, sweet, floral
- Brown Sugar: Deep, molasses like richness
- Unsalted Butter: Salty, nutty, creamy
- Cinnamon & Nutmeg: Warm, woody, aromatic
- 1. Butter Size
- When pulsing the flour and butter, stop when the lumps are the size of a garden pea.
- 2. Filling Thickness
- The apple syrup should be glossy and coat the back of a spoon before it goes into the crust.
- 3. Bake Time
- Exactly 60 minutes at 190°C (375°F) until the edges are a deep chestnut gold.
This apple pie recipe is designed for a 9 inch deep dish plate. If you use a shallow pan, you'll need to reduce the apple quantity slightly or you'll have a massive overflow on your oven floor.
Shopping List Breakdown
Don't just grab any apple. The variety is the soul of this homemade apple pie recipe. If you can't find Honeycrisp, Braeburn or Pink Lady are great alternatives. Avoid Red Delicious - they turn into sauce almost instantly.
Component Analysis
| Ingredient | Science Role | Pro Secret |
|---|---|---|
| All Purpose Flour | Structural base | Chill the measuring cup to keep flour cool |
| Unsalted Butter | Creates flakiness | Use high fat European butter for extra richness |
| Cornstarch | Thickening agent | Mix with a bit of water first to avoid lumps |
| Lemon Juice | Prevents oxidation | Adds a bright "pop" to cut through the sugar |
Ingredients & Substitutes
- 2.5 cups all purpose flour Why this? Standard protein level for a tender crust
- 1 cup unsalted butter, chilled and cubed (Substitute: Vegan butter sticks - Note: Slightly softer crust)
- 1 tsp salt (Substitute: Sea salt for a more mineral taste)
- 1 tbsp granulated sugar (Substitute: None - keeps the crust pale)
- 8 tbsp ice water (Substitute: Ice cold vodka - Note: Reduces gluten for extra tenderness)
- 3 lbs apples, peeled and sliced (Granny Smith and Honeycrisp) (Substitute: Braeburn - Note: Slightly sweeter)
- 0.75 cup brown sugar, packed (Substitute: Coconut sugar - Note: Adds a caramel flavor)
- 0.25 cup granulated sugar (Substitute: Maple syrup - Note: Makes filling wetter)
- 2 tbsp cornstarch (Substitute: Flour - Note: Less translucent finish)
- 1 tbsp ground cinnamon (Substitute: Cassia cinnamon for more punch)
- 0.25 tsp ground nutmeg (Substitute: Allspice)
- 1 tbsp lemon juice (Substitute: Apple cider vinegar)
- 2 tbsp unsalted butter (for sautéing)
- 1 large egg (Substitute: Aquafaba for a vegan wash)
- 1 tbsp milk (Substitute: Heavy cream for a richer gold color)
- 1 tbsp coarse sparkling sugar (Substitute: Turbinado sugar)
Essential Kitchen Gear
You don't need a fancy lab, but a few tools make this apple pie recipe from scratch much easier. A food processor is a lifesaver for the crust, but if you don't have one, a pastry cutter or two forks will do the trick.
I highly recommend a 9 inch deep dish pie plate. Glass or ceramic is great because they hold heat evenly, which helps the bottom crust cook through. If you're using a metal tin, keep a close eye on the bottom, as it can brown faster.
A rolling pin is essential, but if you're missing one, a smooth wine bottle works in a pinch. Just make sure it's clean! Also, have a piece of parchment paper handy to roll the dough on - it prevents sticking and makes transferring the dough to the pan a breeze.
Bringing It Together
Let's crack on with the actual process. I've broken this down into phases so you don't feel overwhelmed.
Phase 1: Preparing the Chilled Dough
Start by combining your flour, salt, and sugar. If you're using a food processor, pulse in the chilled, cubed butter. You want to stop while there are still pea sized lumps. If you over process it into a fine powder, you'll lose all those flakes.
Gradually add the ice water, one tablespoon at a time. Stop the second the dough just holds together when you pinch it. Divide the dough into two discs, wrap them tightly in plastic, and stick them in the fridge for 1 hour. This is where the gluten relaxes, ensuring your crust doesn't shrink in the oven.
Phase 2: Crafting the Concentrated Filling
Melt 2 tablespoons of butter in a large skillet over medium heat. Toss in your sliced apples, brown sugar, granulated sugar, cinnamon, nutmeg, and lemon juice.
Sauté them for 5-8 minutes. You'll hear a gentle sizzle as the sugars melt and the apples soften slightly. You're looking for the liquid to thicken into a glossy, velvety syrup.
Once it's thick, stir in your cornstarch slurry (cornstarch mixed with a tiny bit of water) and remove it from the heat. Let this cool completely before filling the crust.
Phase 3: Assembly and Baking
Roll out your first disc on a floured surface until it's about 12 inches wide. Gently drape it over your 9 inch pie plate. Press it into the corners, but don't stretch the dough - stretching leads to shrinkage.
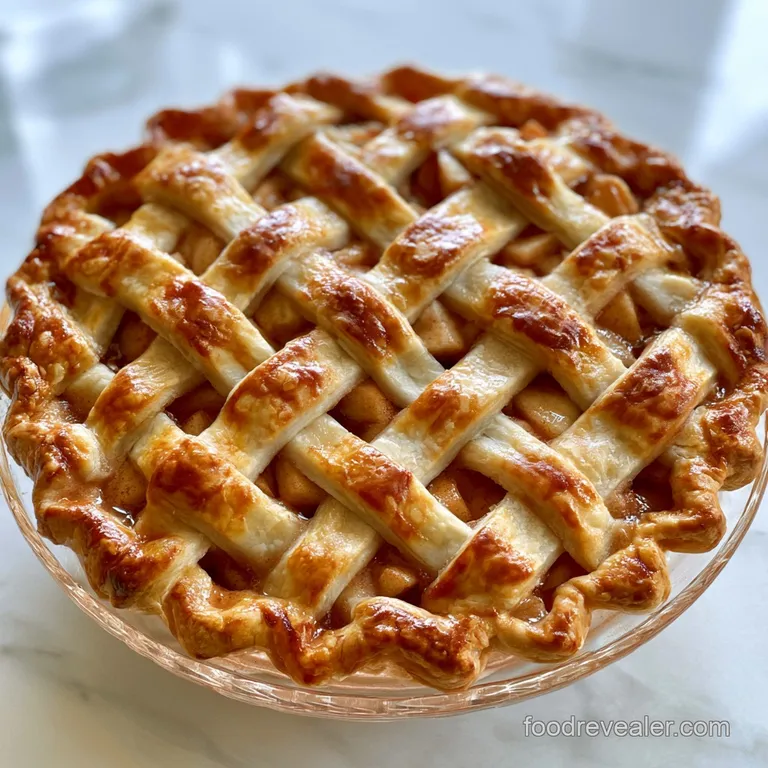
Pour in that cooled apple filling, piling it slightly higher in the center. Roll out the second disc. You can go for a full cover with a few steam vents or try a lattice design if you're feeling fancy. Crimp the edges firmly to seal the juices inside.
Brush the top with the beaten egg and milk wash, then sprinkle the sparkling sugar. Bake for 60 minutes. You'll know it's done when the crust is golden brown and the filling is bubbling through the vents.
Pro Tips & Pitfalls
Even with a simple apple pie recipe, things can go sideways. I've made every mistake in the book, so let me save you the trouble.
Chef's Note: If you find your edges are browning too quickly while the center is still pale, don't panic. Just cover the edges with a ring of aluminum foil. This protects the crust while allowing the rest of the pie to finish baking.
The "Soggy Bottom" Solution The key to a crisp base is temperature. Start your oven at a high heat (around 190°C) and make sure your pie plate isn't too cold when the filling goes in.
Some people like to blind bake the bottom crust for 10 minutes, but if you pre cook your filling as we did here, it's usually not necessary.
For the Perfect Apple Texture Avoid over cooking the apples in the skillet. You want them "al dente" - slightly softened but still holding their shape. They will finish cooking in the oven. If they're already mushy when they go in, you'll end up with apple jam instead of a pie.
For a Shattering Crust Freeze your butter for 10 minutes before cubing it. This ensures the butter stays solid longer during the mixing process. Also, don't over handle the dough with your warm hands. Work quickly and efficiently.
Troubleshooting Common Issues
| Problem | Root Cause | Solution |
|---|---|---|
| Crust is tough/chewy | Over mixing the dough | Use a food processor or stop as soon as it clumps |
| Filling is too runny | Apples were too watery | Increase cornstarch by 1 tsp or sauté apples longer |
| Crust is pale | Egg wash was too thin | Add more egg yolk and less milk for a deeper gold |
Common Mistakes Checklist
- ✓ Did you use ice cold water?
- ✓ Are the butter lumps pea sized?
- ✓ Did the filling cool before going into the crust?
- ✓ Did you avoid stretching the dough during lining?
- ✓ Is the oven fully preheated?
Make It Your Own
Once you've nailed the basic apple pie recipe, you can start playing with the flavors. If you want a more rustic vibe, try an apple pie recipe crumble top instead of a second crust. Just mix flour, butter, and brown sugar into crumbs and pile them on top.
For an old fashioned apple pie recipe twist, add a pinch of ground cloves or a splash of bourbon to the filling. The bourbon adds a woody, caramelized depth that pairs brilliantly with the tart apples. If you're looking for something more modern, try adding a layer of thinly sliced pears to the mix.
If you love this kind of cozy baking, you might also enjoy my Sourdough Cinnamon Rolls, which use a similar approach to building deep, warm flavors. Or, if you're in the mood for something salty to balance the sweet, these Sourdough Discard Crackers are a great companion for a dessert spread.
Customization Shortcuts
- If you want more tartness → use 100% Granny Smith.
- If you want a richer crust → replace 2 tbsp of butter with cold lard.
- If you're in a rush → use an apple pie recipe premade crust (just chill it first!).
Storage & Reheating
Leftovers are the best part. This apple pie recipe keeps surprisingly well if you store it correctly. Keep the pie on the counter for up to 2 days, but cover it loosely with foil. Don't seal it airtight, or the crust will absorb moisture and get soft.
For longer storage, you can keep it in the fridge for up to 5 days. When you're ready to eat a slice, don't use the microwave - that's a one way ticket to Mushy Town. Instead, pop a slice in a 180°C (350°F) oven for about 10 minutes.
This re crisps the crust and warms the filling without ruining the texture.
Freezing Guidelines You can freeze this pie! I recommend freezing it unbaked. Wrap the assembled pie in plastic wrap and then a layer of heavy duty foil. Store in the freezer for up to 3 months. When you're ready, you can freeze and bake a frozen pie by adding about 15-20 minutes to the baking time.
Zero Waste Tips Don't throw away those apple peels! Toss them with a bit of cinnamon and sugar, then bake them at 150°C (300°F) until they're crisp. They make a brilliant, healthy snack.
Any leftover dough discs can be rolled out into small circles, topped with jam, and baked as mini thumbprint cookies.
Serving Suggestions
A slice of this pie is great on its own, but a few additions can make it feel like a restaurant dessert. The classic choice is a scoop of high-quality vanilla bean ice cream. The cold creaminess melting into the warm, tart apples is just pure heaven.
If you want something a bit more sophisticated, try a dollop of crème fraîche or a drizzle of salted caramel sauce. For a festive holiday table, this pie pairs beautifully with a side of Cranberry Sauce to add a bright, zesty contrast to the meal.
Right then, you've got everything you need. This apple pie recipe isn't about perfection; it's about that feeling of comfort and the joy of sharing something homemade. Whether it's for a big party or just a rainy Tuesday, I hope this becomes a staple in your kitchen.
Now, go get those apples peeled and let's get baking!
Recipe FAQs
What is the secret to a good apple pie?
Combine a mix of tart and sweet apples with a chilled crust. Using Granny Smith and Honeycrisp provides a balanced flavor, while cold butter ensures a flaky texture. If you enjoyed working with chilled dough here, see how we adapt dough handling for our pizza dough recipe.
Should you cook your apples before putting them in a pie?
Yes, sauté them first. Cooking sliced apples with sugar and butter for 5-8 minutes prevents the filling from releasing excess water, which stops the crust from getting soggy.
What are the common mistakes when baking apple pie?
Using warm butter or overworking the dough. These errors melt the fat and destroy the flakiness. Another common mistake is pouring hot filling into the crust instead of letting it cool first.
Do I bake my pie crust before I bake my apple pie?
No, bake the crust and filling together. This recipe uses a double crust that seals the filling, protecting the bottom and ensuring a cohesive bake over 60 minutes.
How to prevent a soggy bottom crust?
Sauté the filling and let it cool completely. This controls the moisture level before it hits the dough. Ensure your butter is chilled and the dough has refrigerated for 1 hour before rolling.
Is it true that any type of apple works for this pie?
No, this is a common misconception. Using only sweet apples often results in a mushy texture; a mix of Granny Smith and Honeycrisp is essential for structural integrity and tartness.
How to reheat apple pie without making it mushy?
Heat slices in a 180°C (350°F) oven for 10 minutes. Avoid the microwave, as it ruins the crust texture and makes the filling overly soft.
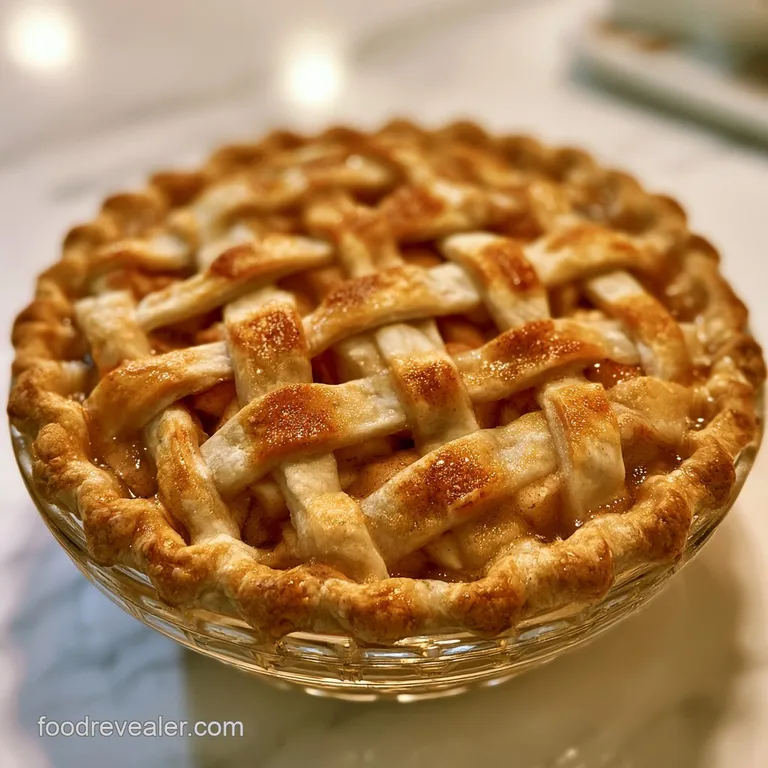
Homemade Apple Pie Recipe