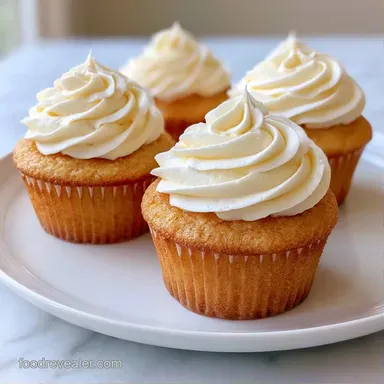
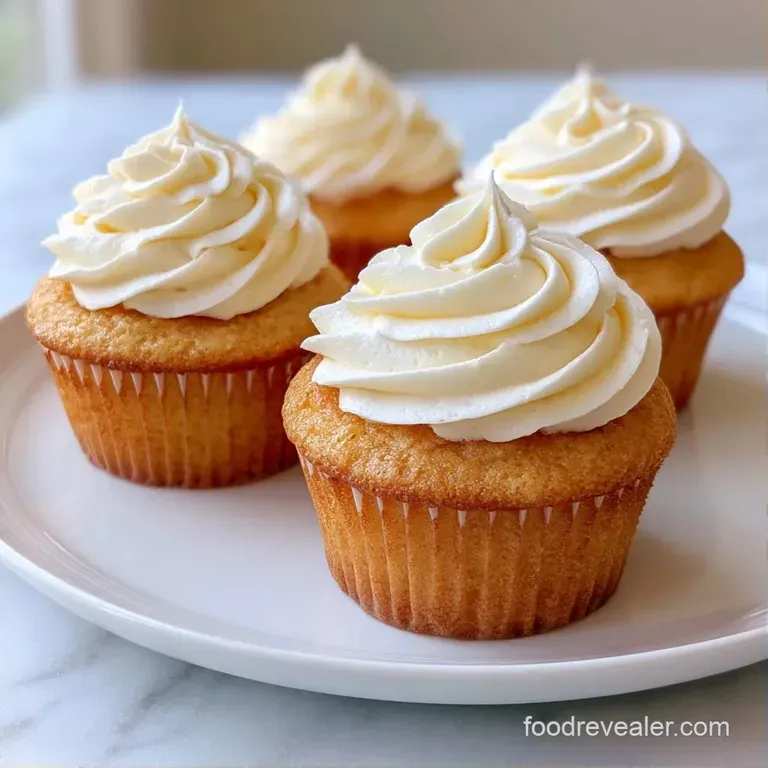
Fluffy Easy Vanilla Cupcakes
- Time: 15 min active + 18 min baking
- Flavor/Texture Hook: Light, airy crumb with a glossy buttercream
- Perfect for: Last minute parties, school treats, or beginner bakers
- Easy Vanilla Cupcakes
- Why the Oil Works
- What Each Ingredient Does
- Gathering Your Essentials
- Necessary Kitchen Tools
- Step-by-Step Baking
- Fixing Common Issues
- Troubleshooting Common Issues
- Fun Flavor Tweaks
- Scaling Your Batch
- Cupcake Baking Myths
- Storage and Waste
- Best Pairing Ideas
- Recipe FAQs
- 📝 Recipe Card
Easy Vanilla Cupcakes
That smell of warm vanilla hitting the air is probably the best part of baking. I remember the first time I tried to make these for a friend's birthday. I spent way too much time worrying about the "perfect" creamed butter, and the cakes ended up dense and heavy.
I realized that for a simple treat, you don't need to overcomplicate things.
These Easy Vanilla Cupcakes are about the win. You get a light, airy result without the kitchen chaos of a ten step process. They don't require fancy equipment, just a couple of bowls and a whisk.
The payoff is a cake that doesn't dry out by the next morning. Because we're using a budget smart approach with oil, these stay soft and tasty even if you don't store them in an airtight container immediately.
Why the Oil Works
The choice of fat changes how the cake feels in your mouth. Here is why this method beats the traditional butter creamed approach for this specific treat.
- Oil vs Butter: Oil stays liquid at room temperature, which means these Easy Vanilla Cupcakes feel moister on your tongue. Butter solids can make a cake feel "stiff" once it cools down.
- The Whisk Method: Mixing everything by hand prevents you from overworking the gluten. This keeps the crumb tender instead of bready.
- Room Temp Liquids: Using milk and eggs at room temperature prevents the oil from separating, which keeps the rise consistent.
The way the batter comes together is all about the emulsion. Since we aren't creaming butter and sugar, we rely on the egg to bind the oil and milk together. This creates a stable structure that holds those air bubbles from the baking powder.
| Method | Time | Texture | Best For |
|---|---|---|---|
| Standard Oven | 18 mins | Even rise, soft edges | Large batches |
| Air Fryer | 12-14 mins | Slightly crispier top | 2-4 cupcakes |
What Each Ingredient Does
Getting the ratio right is the only way to ensure these Easy Vanilla Cupcakes don't sink in the middle. Each part has a specific job.
| Ingredient | What It Does | Best Swap |
|---|---|---|
| Vegetable Oil | Provides moisture and softness | Melted coconut oil |
| Baking Powder | Creates the lift and fluff | 1 tsp baking soda + cream of tartar |
| All Purpose Flour | Gives the cake its structure | 1:1 gluten-free flour blend |
| Whole Milk | Adds richness and hydrates flour | Unsweetened soy milk |
Gathering Your Essentials
Keep your ingredients simple. For the Easy Vanilla Cupcakes base, you only need pantry staples.
- 1.5 cups all purpose flour (190g) Why this? Standard protein level for a balanced crumb
- 0.75 cup granulated sugar (150g) Why this? Dissolves quickly for a smooth batter
- 1.5 tsp baking powder (7g) Why this? Provides the necessary lift
- 0.25 tsp salt (1.5g) Why this? Balances the sweetness
- 0.5 cup neutral vegetable oil (120ml) Why this? Cheaper than butter and stays moist
- 1 large egg (50g) Why this? Emulsifies the fat and liquid
- 0.5 cup whole milk (120ml) Why this? Adds fat for a better mouthfeel
- 2 tsp pure vanilla extract (10ml) Why this? The primary flavor profile
For the buttercream frosting, you'll need: 0.5 cup unsalted butter, softened (115g) 2 cups powdered sugar (240g) 2 tbsp heavy cream or milk (30ml) 1 tsp pure vanilla extract (5ml) 1 pinch salt (0.5g)
If you're looking to save a few cents, you can use canola oil instead of vegetable oil. According to USDA FoodData, most neutral oils provide similar fat profiles, meaning the taste won't change.
| Original Ingredient | Substitute | Why It Works |
|---|---|---|
| Whole Milk (0.5 cup) | Almond Milk (0.5 cup) | Similar liquid ratio. Note: Slightly less rich |
| Vegetable Oil (0.5 cup) | Melted Butter (0.5 cup) | Adds flavor. Note: Makes the cake denser |
| Powdered Sugar (2 cups) | Granulated Sugar (blended) | Same sweetness. Note: Texture may be grainier |
Necessary Kitchen Tools
You don't need a fancy stand mixer for these Easy Vanilla Cupcakes. I usually just use a handheld whisk and a couple of medium bowls.
A standard 12 slot muffin tin is a must. If you don't have paper liners, you can grease the tin with oil or butter, but liners make cleanup way faster. For the frosting, a simple piping bag or even a plastic Ziploc bag with the corner snipped off works just fine.
I've found that using a digital scale for the flour is the only way to avoid "packing" the measuring cup too tight. Too much flour is the number one reason for a dry cupcake.
Step-by-step Baking
Follow these steps closely to get that pale golden finish.
- Preheat your oven to 350°F (176°C) and line your pan with paper liners. Note: Doing this first ensures the oven is stable.
- In a large bowl, whisk together the flour, granulated sugar, baking powder, and salt until no lumps remain.
- Create a well in the center of the dry ingredients and pour in the oil, egg, milk, and vanilla.
- Whisk gently from the center outward until the batter is smooth and pale. Stop immediately once flour streaks disappear to ensure a tender crumb.
- Divide the batter evenly among the 12 liners, filling each about 2/3 full. Note: Overfilling leads to overflow and flat tops.
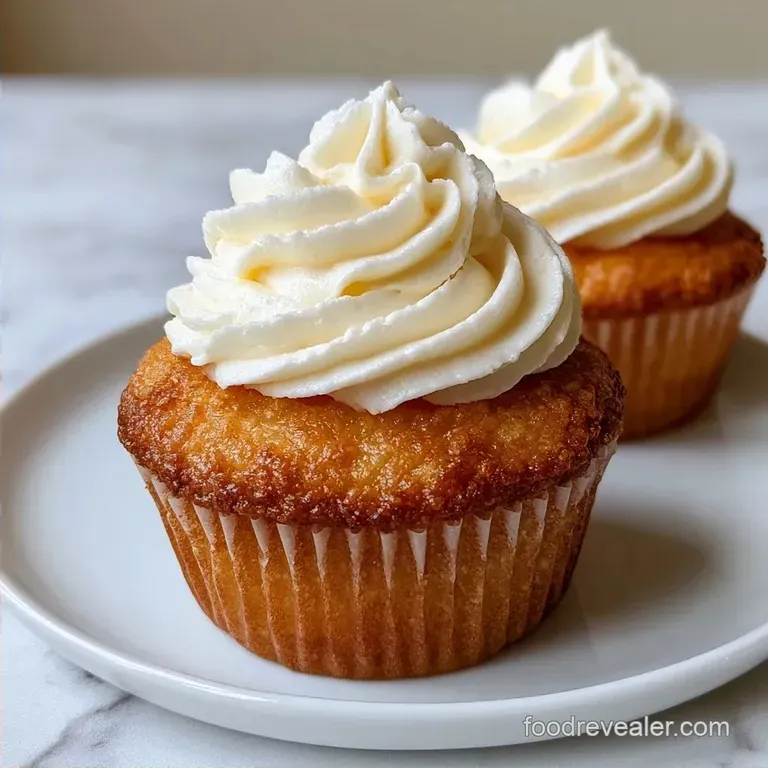
- Bake for 18 minutes until the edges are pale golden and the center springs back when lightly touched.
- Let cupcakes cool completely on a wire rack. Note: Frosting warm cakes will result in a melted mess.
- Beat the softened butter until creamy, then gradually add powdered sugar, cream, and vanilla.
- Whip on high for 2-3 minutes until the frosting is airy, white, and silky, then pipe onto cooled cupcakes in a high swirl.
Chef's Note: If you're in a rush to cool the cakes, pop them in the fridge for 15 minutes. Just don't leave them too long or they'll lose that fresh baked softness.
Fixing Common Issues
Even with Easy Vanilla Cupcakes, things can go sideways. Most of the time, it's a temperature or mixing issue.
Troubleshooting Common Issues
| Issue | Solution |
|---|---|
| Why Your Cakes Sunk | If the center drops after you take them out, you likely opened the oven door too early. The rush of cool air collapses the air bubbles before the flour structure has set. |
| Why the Crumb is Tough | Tough cakes happen when you over whisk. Once the flour is wet, gluten starts to form. If you keep mixing, the cake becomes bready instead of cakey. |
| Why the Frosting is Runny | This usually happens if the butter was too melted or the kitchen is too hot. Put the frosting bowl in the fridge for 10 minutes, then whip it again. |
Fun Flavor Tweaks
Once you've nailed the base for these Easy Vanilla Cupcakes, you can start playing with the flavors. I love making a batch and splitting them up for different people.
If you want a citrus vibe, add a teaspoon of lemon zest to the dry ingredients. For something a bit more sophisticated, replace one teaspoon of vanilla with almond extract. It gives them a wedding cake flavor that's really popular.
For those who want something different, you might try my Classic Banana Nut Bread as a companion dessert for a weekend brunch.
Quick Decision Guide: If you want a fruity twist, fold in 1/4 cup of blueberries. If you want a richer taste, swap the milk for heavy cream. If you want a "birthday" look, add a drop of food coloring to the frosting.
Scaling Your Batch
Adjusting the size of your bake for Easy Vanilla Cupcakes is straightforward, but baking times change.
Scaling Down (6 Cupcakes): Cut everything in half. For the egg, crack it into a bowl, whisk it, and use about 25g. Use a smaller pan or leave gaps between the liners in a large pan. Reduce bake time by about 2-3 minutes.
Scaling Up (24 Cupcakes): Double the ingredients. I suggest working in two separate batches unless you have a massive bowl. If you bake two trays at once, rotate them halfway through (at the 9 minute mark) to ensure the heat hits both evenly.
Pro Tip for Large Batches: When doubling, don't double the salt and baking powder exactly. Use 1.5x the amount of salt first, then taste your frosting. Too much salt can become noticeable in larger volumes.
Cupcake Baking Myths
There are a few things people tell you about baking that just aren't true.
Sifting flour is not always necessary. While it helps with lumps, whisking the dry ingredients vigorously for 30 seconds does the same thing for these Easy Vanilla Cupcakes.
You don't need a professional mixer to get "fluffy" frosting. A hand mixer or even a strong arm with a whisk can get the job done. The key is the whipping time, not the power of the machine.
Finally, using "cake flour" isn't a requirement for a soft cake. All purpose flour works perfectly here because the oil provides the tenderness that cake flour usually offers.
Storage and Waste
Keep your Easy Vanilla Cupcakes in an airtight container. In the fridge, they last about 5 days. In the freezer, they stay good for 3 months.
Freezing Tip: Freeze the cupcakes without frosting. Once thawed, let them come to room temperature before piping the buttercream. This prevents the cake from getting soggy.
Zero Waste Ideas: If you have leftover buttercream, don't toss it. Put it in a small jar in the fridge and use it as a dip for sliced apples or strawberries. If you have a few cupcakes that didn't rise well, crumble them up, mix with a bit of melted butter and honey, and press them into a pan to make a quick cake pop base.
Best Pairing Ideas
Since these Easy Vanilla Cupcakes are quite sweet and creamy, they pair well with things that have a bit of acidity or bitterness.
A cup of strong black coffee or a dark roast espresso cuts through the sugar of the buttercream perfectly. For a celebratory brunch, I highly recommend serving these alongside a Classic Mimosa for a bright, citrusy contrast.
If you're serving them as part of a dessert platter, add some fresh raspberries or sliced kiwi. The tartness of the fruit balances the vanilla profile and makes the plate look much more vibrant.
Right then, you've got everything you need to get these in the oven. Just remember to keep the whisking gentle and the oven door closed. Trust me, the patience pays off when you bite into that first fluffy cake. Happy baking!
Recipe FAQs
Why are my cupcakes tough instead of tender?
You likely over whisked the batter. Once the flour is wet, gluten starts to form; mixing too long makes the cake bready. Stop immediately once flour streaks disappear.
Why did the centers of my cupcakes sink?
The oven door was likely opened too early. This allows a rush of cool air to collapse the air bubbles before the flour structure has set.
How to fix runny buttercream frosting?
Place the frosting bowl in the fridge for 15 minutes. This chills the butter and firms up the texture, making it easier to pipe.
Can I freeze these cupcakes?
Yes, but freeze them without frosting. Thaw them to room temperature before piping the buttercream to prevent the cake from getting soggy.
Is it true I must boil the milk before adding it to the batter?
No, this is a common misconception. Using whole milk at room temperature works perfectly for this recipe and its 350°F baking temperature.
How to tell when the cupcakes are finished baking?
Bake for 18 minutes until edges are pale golden. The center should spring back when lightly touched to ensure they are fully cooked.
How long do these cupcakes stay fresh?
They last 5 days in the fridge. Keep them in an airtight container to maintain moisture. For a treat with a different texture, try our fudgy brownies.
Easy Vanilla Cupcakes